The Merge Countdown: How Not to Miss The Merge With Web3 Actions
Learn how to use Web3 Actions to set up automated notifications so you know how much time is left until The Merge. Choose Slack, Discord, or Telegram as a destination for your messages. Set up your personal countdown and stay up to date without having to manually check the TTD.
In this post
The Merge is indeed coming and everyone’s impatiently waiting for that final moment the Terminal Total Difficulty (TTD) hits its threshold and Ethereum finally transitions to Proof of Stake. Since September 15th (the tentative Merge due date) is just around the corner, you’re probably going through the Merge readiness checklist, constantly reading the most recent updates on shadow fork merges, and hoping everything goes as smoothly as possible.
With so many tasks to complete before The Merge, how can you even stay up to date with how much time is left? It’d be a shame to miss it. So, we give you a simple solution: Tenderly Web3 Actions. Instead of checking the TTD manually, simply set up a Web3 Action and get notifications of the final countdown as The Merge approaches.
How Web3 Actions help you keep track of The Merge
Let’s cut to the chase – you can set up a Web3 Action to send you messages notifying you how much time is left until The Merge. Depending on your team's collaboration space, you can decide whether to receive notifications on Slack, Discord, or Telegram. Once you set up your Action, enjoy having countdown notifications delivered right to your inbox. Yes, you heard that right!
How does this work?
Wondering how this is even possible? Okay, here it goes.
First, we consider the fact that total difficulty changes as The Merge approaches. We then approximate the time until The Merge by assuming it takes 12 seconds to mine a single block. So, we come to this expression: 12*blocksUntilMerge.
Then, to set up The Merge notifications with Web3 Actions, you need to:
- Define an Action threshold. This is a time interval in seconds prior to The Merge when the Action should start sending notifications. For example, if the threshold is set to seven days (7*24*60*60 s), the Action will start sending notifications once The Merge is seven days away.
The rest is up to the Action:
- The Action gets called along with a block’s payload whenever a block is mined.
- The Action extracts
TotalDifficultyandBlockDifficultyfrom the block event. - The Action calculates the approximate number of seconds and blocks to be mined until The Merge.
- The Action starts sending notifications to the configured delivery channel once the time until The Merge reaches the configured threshold.
What packages do you need to set up this Action?
In this example, you’ll use the following packages:
- Axios for sending notifications
- Luxon for easier time calculations
- Bignumber for working with large numbers such as block, total, and terminal difficulties
These packages come pre-bundled with Tenderly runtime, so you can use them simply by importing them at the beginning of your code.
ℹ️ You can easily modify the Action code to use different packages depending on your preference. To do this, take a look at a similar example of using Web3 Actions to send Discord messages about Uniswap pools. The example will show you how to add your own package.json with the packages you prefer.
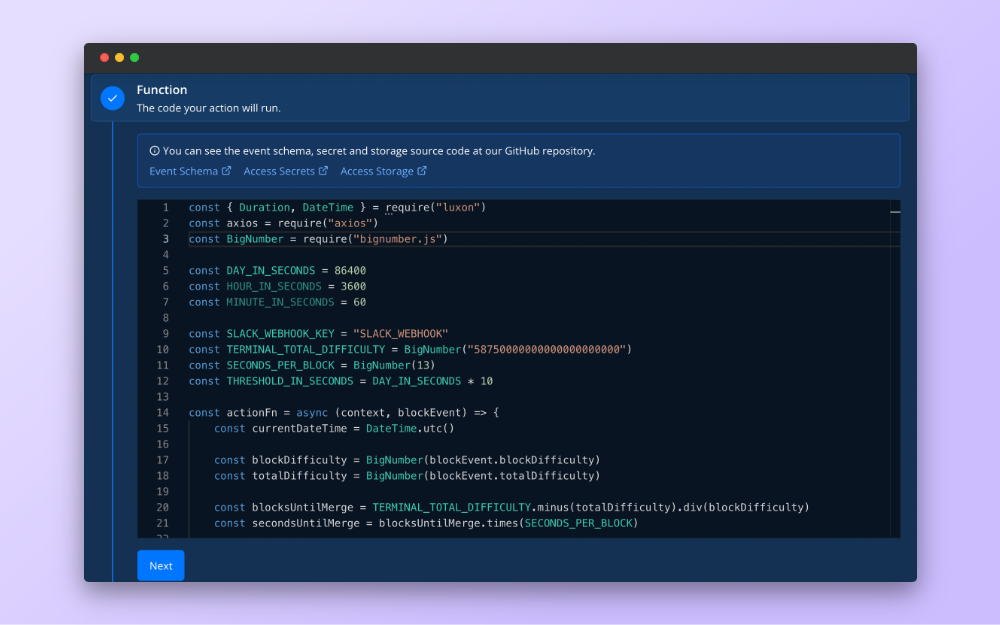
What the Web3 Action code looks like
Here’s the entire version of the Web3 Action code you can use to set up countdown notifications for the upcoming Merge:
const { Duration, DateTime } = require("luxon")
const axios = require("axios")
const BigNumber = require("bignumber.js")

const DAY_IN_SECONDS = 86400

const SLACK_WEBHOOK_KEY = "SLACK_WEBHOOK"
const TERMINAL_TOTAL_DIFFICULTY = BigNumber("58750000000000000000000")
const SECONDS_PER_BLOCK = BigNumber(12)
const THRESHOLD_IN_SECONDS = DAY_IN_SECONDS * 7

const actionFn = async (context, blockEvent) => {
    const currentDateTime = DateTime.utc()

    const blockDifficulty = BigNumber(blockEvent.blockDifficulty)
    const totalDifficulty = BigNumber(blockEvent.totalDifficulty)

    const blocksUntilMerge = TERMINAL_TOTAL_DIFFICULTY.minus(totalDifficulty).div(blockDifficulty)
    const secondsUntilMerge = blocksUntilMerge.times(SECONDS_PER_BLOCK)

    const mergeDateTime = currentDateTime.plus(Duration.fromObject({ seconds: secondsUntilMerge.toNumber() }))
    const thresholdDateTime = mergeDateTime.minus(Duration.fromObject({ seconds: THRESHOLD_IN_SECONDS }))

    const shouldNotify = shouldSendNotification(currentDateTime, thresholdDateTime, mergeDateTime)
    if (!shouldNotify) {
        return
    }

    const notification = formatNotification(currentDateTime, mergeDateTime)
    await sendSlackNotification(context.secrets, SLACK_WEBHOOK_KEY, notification)
}

function shouldSendNotification(currentDateTime, thresholdDateTime, mergeDateTime) {
    return thresholdDateTime <= currentDateTime && currentDateTime <= mergeDateTime
}

function formatNotification(currentDateTime, mergeDateTime) {
    const timeToMerge = mergeDateTime.diff(currentDateTime)
    return `Merge will occur on ~ ${mergeDateTime.toISO()}!\n Time until merge ~ ${timeToMerge.toFormat("dd 'days' hh 'hours' mm 'minutes' ss 'seconds'")}!`
}

async function sendSlackNotification(secrets, slackWebhookKey, notification) {
    const slackWebhook = await secrets.get(slackWebhookKey)

    await axios.post(slackWebhook, {
        text: notification,
    })
}

module.exports = { actionFn }
How to set up The Merge countdown with Web3 Actions
Before creating the Action, you first need to define a Slack webhook for receiving notifications. The webhook is sensitive information, so it shouldn’t be visible in the source code. Luckily, Web3 Actions have just the right tool for the job – Action Secrets!
Of course, if you prefer some other platform such as Telegram or Discord, feel free to use it instead.
How to add a Slack webhook to Secrets
Prerequisite: Download the Slack app, set up a channel for receiving notifications, and get its webhook in a few steps.
Once you have the webhook link, store it in Action Secrets using the following steps:
Log in to the Tenderly Dashboard and navigate to the Actions section in the left sidebar.
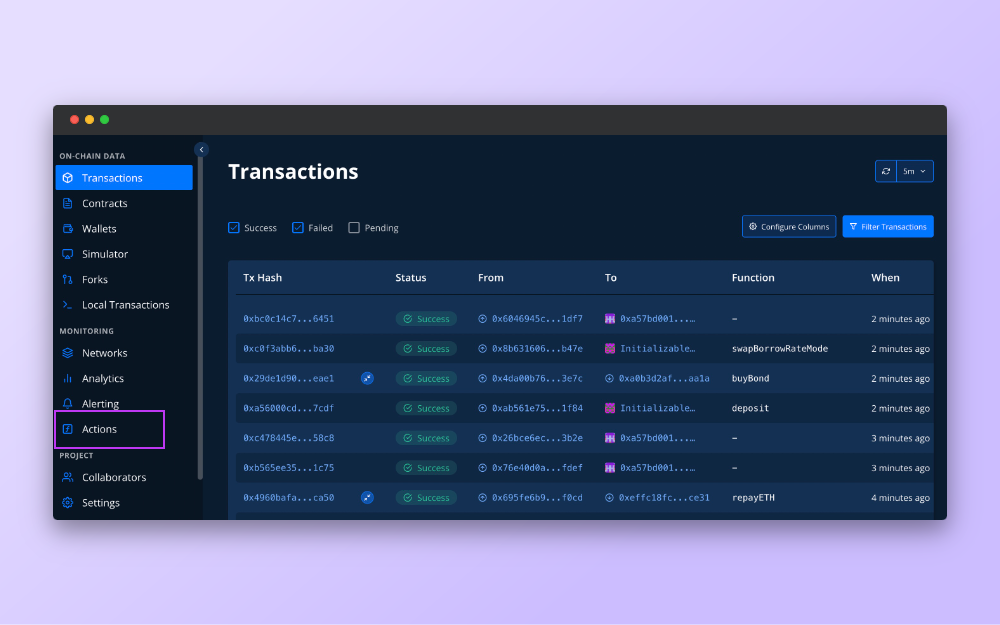
Once you click the Actions button, you’ll access the Actions overview screen with a list of your previous Actions (if any). In this example, there’s only one Action present. Next, click Secrets in the navigation bar.
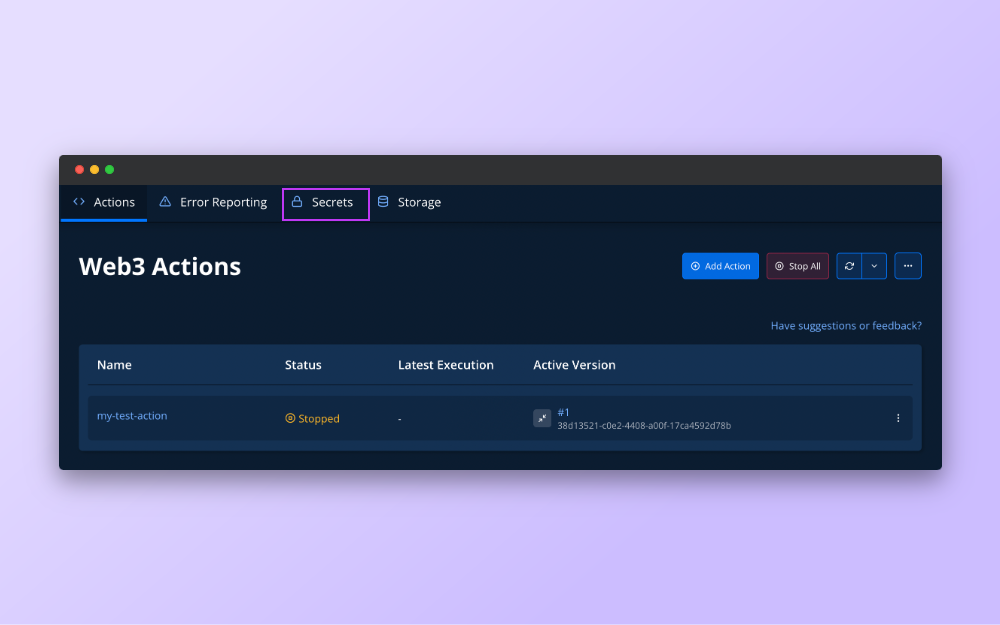
Once on the Secrets screen, hit the Add Secret button, which will open the next window where you can create a new Secret.

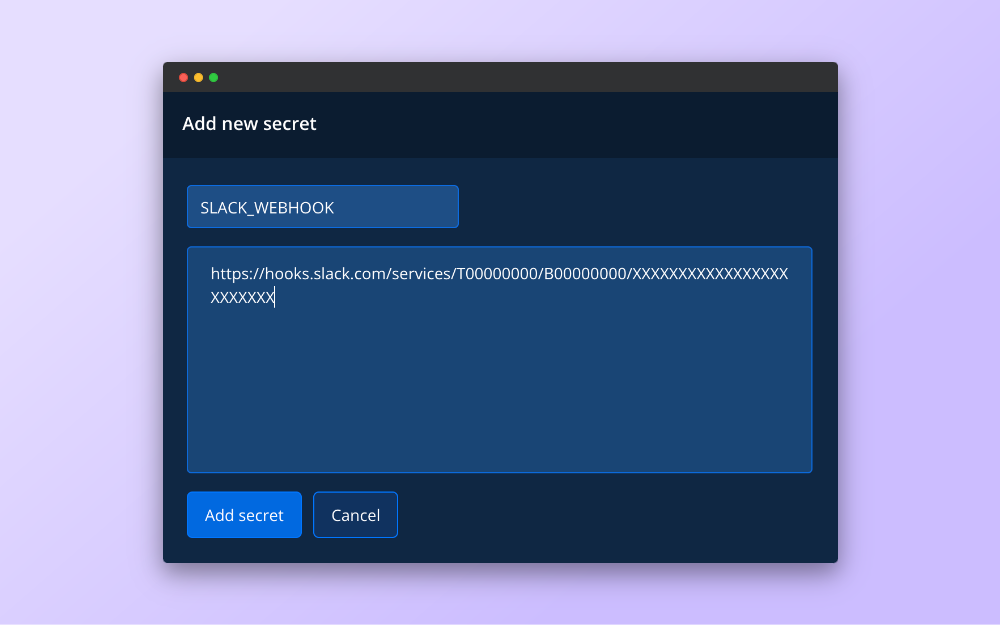
To create a new Secret, you need to add the following two properties:
- The Secret name that you’ll use to read your Secret from the code. In this case, the name of the Secret is
SLACK_WEBHOOK. - The Secret value that represents the data you want to safely store. This is where you should input the webhook you created on Slack.
After adding these values, click the Add secret button in the bottom left corner of the screen to create the Secret.
Congratulations! You can now see your newly created Secret on the Acton Secrets screen.

Now, it’s action time (pun intended)! Follow these steps to set up your own Merge countdown with Web3 Actions:
Go back to the Actions screen and click the blue Add Action button in the upper right corner.

This will open a screen where you need to complete a few steps to create a new Action:
- Choose the Action trigger type
- Add the Action function in JavaScript
- Configure the Action trigger
- Name your Action and add a description
- Add destinations where you’d like to receive notifications if the Action fails to execute
1. Choose the Action trigger type
First, set up the Action trigger type. Since you need to track how Total Difficulty changes with each block, go with the Block trigger type as it’s the most suitable one in this case.

2. Add the Action function
Next, provide the actual code that will run every time the Action executes. Copy and paste the code from the previous section into the editor.
3. Configure the Action trigger
After that, configure the Block trigger by specifying:
- Which network you’re monitoring: The Merge and all the fun are happening on Mainnet, so choose that as the network for your Action.
- How many blocks should be mined before the Action triggers: Total Difficulty changes with each mined block, so set the number to 1.
ℹ️ If N is the number of blocks and NET is the network the Action should track, the following best describes the behavior of the trigger: The Action will run once every N mined block on the NET network.
This means that your Action will run on every block mined on Ethereum Mainnet.

4. Name the Action
Next, name your Action and add a description if you’d like.

5. Add Action destinations
Finally, set up a destination for notifications in the event the Action execution fails. This allows you to monitor the executions of the Action, like watching Watchmen.
Well done, you’ve successfully created The Merge Action! 🎉
Once everything is set up, you’ll see the newly created Action. The Action is automatically deployed to Tenderly infrastructure so it can execute. Notice the yellow notification letting you know the Action is being deployed.

Finally, the Action will be active right after deployment, which means the countdown has started. Once the threshold is reached, the Action will start sending notifications to the destination channel specified in the code logic.

That’s it! You can now sit back and relax knowing that you’ll receive updates about The Merge right in your inbox.
How to write the Web3 Action code for The Merge step by step
For an in-depth insight, let’s break down the Action code and go through it step by step.
1. Set up the Action threshold
The threshold represents a point in time (expressed in seconds) before The Merge after which the Action should start sending you notifications. Once The Merge is the specified number of seconds away, the Action will start sending notifications to the destination of your choice.
2. Calculate The Merge date
To calculate The Merge date, you need the following:
- Number of blocks until The Merge
- Remaining time until The Merge
- Time needed to mine a block
- Terminal Total Difficulty
- Total difficulty and block difficulty
The number of blocks until The Merge
So, you first need to determine the approximate number of blocks left until The Merge. So, let’s assume that the block difficulty is, on average, similar between blocks. In this case, use the following formula to calculate the number of blocks left until The Merge:
blocksUntilMerge = (TerminalTotalDifficulty - TotalDifficulty)/BlockDifficulty
The remaining time until The Merge
Once you determine the number of blocks until The Merge, you can calculate the remaining time by using the following formula:
TimeUntilMerge = (BlocksUntilMerge) * SecondsPerBlock
The time needed to mine a block
On average, it takes roughly 12 seconds to mine a single block. Store this value as the SECONDS_PER_BLOCK global constant.
Terminal Total Difficulty
The Terminal Total Difficulty is set to 58750000000000000000000. So, keep this as a global constant as well.
Total Difficulty and Block Difficulty
The TotalDifficulty and BlockDifficulty can be retrieved from the block payload the Action receives when it gets called. Note that these properties are of the string type in the payload, so you first need to convert them to BigNumber to work with them.
Here’s a snippet of the code performing the above calculation:
const TERMINAL_TOTAL_DIFFICULTY = BigNumber("58750000000000000000000")
const SECONDS_PER_BLOCK = BigNumber(12)

const currentDateTime = DateTime.utc()

const blockDifficulty = BigNumber(blockEvent.blockDifficulty)
const totalDifficulty = BigNumber(blockEvent.totalDifficulty)

const blocksUntilMerge = TERMINAL_TOTAL_DIFFICULTY.minus(totalDifficulty).div(blockDifficulty)
const secondsUntilMerge = blocksUntilMerge.times(SECONDS_PER_BLOCK)

const mergeDateTime = currentDateTime.plus(Duration.fromObject({ seconds: secondsUntilMerge.toNumber() }))
3. Choose when to send notifications
Next, set up the logic that checks whether the Action should send a notification or not. While the Action runs on every mined block, it should send a notification only if it meets the following condition: There is less than the Threshold time left until The Merge, but The Merge hasn’t happened yet.
Here’s a function that performs this check:
function shouldSendNotification(currentDateTime, thresholdDateTime, mergeDateTime) {
    return thresholdDateTime <= currentDateTime && currentDateTime <= mergeDateTime
}
4. Send the notification
Now, onto the actual notification sending part! This example demonstrates how to send notifications to Slack. However, feel free to adjust the code to a delivery channel that suits you and your team.
To send notifications, you need to write a function that will:
- Extract the Slack webhook from Secrets.
- Send a notification to the webhook.
Here’s the entire function:
async function sendSlackNotification(secrets, slackWebhookKey, notification) {
    const slackWebhook = await secrets.get(slackWebhookKey)

    await axios.post(slackWebhook, {
        text: notification,
    })
}
Please note that you need to use the axios package at this point. Since it’s a part of Tenderly runtime, simply import it at the beginning of the Action code.
Start The Merge countdown with Web3 Actions
Web3 Actions enable you to set up notifications that will update you on the time left until The Merge. Whether you’re using Slack, Telegram, or Discord, you can easily adjust the Action code to meet your team’s needs. This way, you can stay up to date without having to manually check how the TTD progresses.
The best of all? By the time you set this up, you’ll master the use of Web3 Actions and unlock so much more this serverless backend has to offer. So, head over to the Tenderly Dashboard and let the countdown begin!
Subscribe to our newsletter