Announcing Official Hardhat (Buidler) Support: How to Level-Up Your Smart Contract Productivity Using Hardhat + Tenderly
I'm thrilled to announce that you can add Tenderly to your Hardhat development workflow. After you integrate Tenderly with your local Hardhat installation, you'll be able to debug, add, and monitor your contracts with Tenderly in seconds!
In this post

As the Weekend would put it: I feel it coming, I feel it coming, babe. And what is coming exactly? Hardhat is coming!
If you just want to see how to integrate Tenderly with Hardhat, you can skip to that section here.
"What is Hardhat?" you might ask. Hardhat is a development environment to compile, deploy, test, and debug your Ethereum software. Developed by Nomic Labs, you might know Hardhat as Buidler, and you can read more about the name change and what's coming up next here.
This article is structured into several parts:
- The Origin Story: How we started collaborating with Nomic Labs. A story of friendship
- The Announcement: The Tenderly Hardhat plugin and export support. A tale of surprise
- The Walkthrough: How to integrate Tenderly with Hardhat. A chronicle of wisdom
- The Teaser: What's next for Tenderly and local tooling. An account of inspiration
But first, for all of our new Buidler/Hardhat friends, I’ll briefly talk about Tenderly and how it can make your Ethereum life so much easier.
What is Tenderly and how can it help me?
Great question! Tenderly is an advanced Ethereum monitoring, debugging, and data platform.
Be it that you are a single developer starting with your dApp and need help with debugging or an experienced team that needs advanced analytics: Tenderly is for you.
Tenderly enables you to do so many things like:
- Monitor your Smart Contracts in real-time across all public networks
- Filter and search transactions across all of your Smart Contracts
- Debug, profile and introspect all on-chain transactions
- Receive real-time alerts for anything that happens on chain (Successful/Failed Transactions, Function Calls, Emitted Events with parameter matching, and so much more...)
- Use all of the Tenderly tooling for local Ganache or Geth transactions (saving countless hours) via the
exportcommand - Ability to simulate transactions without submitting them on-chain (yes, even via an API)
- Advanced analytics that can cater to even the most complex dApps and protocols
- Use webhooks to get real-time notifications for your Smart Contracts
Our mission is to be your one-stop-shop for all things Ethereum data, from your first contract running on a local Ethereum node, all the way to your Mainnet launch and beyond!
If you want to learn more, you can read our article about 10 ways to save time during Blockchain development by using Tenderly.
The Origin Story
It was the far year of 2019. At least that's far in the world of crypto. Multiple teams across the Ethereum ecosystem got together to discuss what is missing in the developer tooling space. That’s when we met the awesome Nomic Labs team.
Fast forward to this year, and you could already see the fruits of this friendship. We worked together on releasing the long-awaited console.log feature, bringing the JSON-RPC to the Hardhat EVM, and on the DevX effort.
The Announcement
I'm thrilled to announce that you can add Tenderly to your Hardhat development workflow. After you integrate Tenderly with your local Hardhat installation, you'll be able to debug, add, and monitor your contracts with Tenderly in seconds!
Today, we'll be releasing a couple of things:
- Hardhat plugin: Add your contracts deployed over all public networks (either via tasks or directly through code)
- Export support for the Hardhat EVM: Use all of the Tenderly tooling for your local transactions during development
Without further ado, let's see how all of these components fit together to supercharge your already fast Hardhat development workflow!
The Walkthrough
By the end of this section, you'll learn several handy tools for your local toolchain:
- How to setup Hardhat
- How to install Tenderly and integrate it with Hardhat
- How to deploy your contracts via ethers.js
- How to use the `tenderly export` command to debug and profile local transactions
- How to add those contracts directly through the hardhat-tenderly tasks and through the Tenderly CLI
- How to add those Smart Contracts directly through code
How to setup Hardhat
First things first, we need to add Hardhat into our project. You can follow along in an empty directory (I’ll be using yarn):
yarn add hardhatNext up, we’ll initiate our project by using the npx hardhat command:
888 888 888 888 888
888 888 888 888 888
888 888 888 888 888
8888888888 8888b. 888d888 .d88888 88888b. 8888b. 888888
888 888 "88b 888P" d88" 888 888 "88b "88b 888
888 888 .d888888 888 888 888 888 888 .d888888 888
888 888 888 888 888 Y88b 888 888 888 888 888 Y88b.
888 888 "Y888888 888 "Y88888 888 888 "Y888888 "Y888
👷 Welcome to Hardhat v2.0.0-rc.1 👷
✔ What do you want to do? · Create a sample project
✔ Hardhat project root: · /src/super-awesome-project
✔ Do you want to add a .gitignore? (Y/n) · y
✔ Help us improve Hardhat with anonymous crash reports & basic usage data? (Y/n) · true
✔ Do you want to install the sample project's dependencies with yarn (@nomiclabs/hardhat-waffle ethereum-waffle chai @nomiclabs/hardhat-ethers ethers)? (Y/n) · yAnd we have a sample project set up! You can run npx hardhat test to check if everything is working.
How to install Tenderly and integrate it with Hardhat
Now that we have the Hardhat project all set up, it’s time to add Tenderly into the mix. We’ll be installing the hardhat-tenderly plugin and the Tenderly CLI, which we’ll be using later:
yarn add @tenderly/hardhat-tenderly
brew tap tenderly/tenderly
brew install tenderly
As you can see, I used brew to install Tenderly. You can find the alternative installation steps here.
To let know Hardhat to load the Tenderly plugin, add the following line to your hardhat.config.js:
require("@tenderly/hardhat-tenderly")Next up, we can use the CLI to authenticate our development machine with our Tenderly dashboard (if you don’t already have an account, you can register here):
tenderly login
✔ Email
✔ Enter your email: me@email.co
✔ Password: ************
To do the final configuration step, you’ll need to tell Hardhat which Tenderly project to connect to. You can do that by adding the following snippet of code into the hardhat.config.js module.exports:
{
	tenderly: {
		username: "MyAwesomeUsername",
		project: "super-awesome-project"
	}
}
You can find the username and project by opening up https://dashboard.tenderly.co, and copying from the URL https://dashboard.tenderly.co/{USERNAME}/{PROJECT}. Alternatively, you can run tenderly whoami to get the needed information.
The Tenderly plugin is now good to go!
How to deploy your contracts via ethers.js
When you initialized your Hardhat project, there were a couple of default files generated in your project. I’ll pull your attention towards the ./contracts/Greeter.sol and ./scripts/sample-script.js files.
- Greeter.sol: Contains a straightforward Smart Contract we’ll be using for this walkthrough
- sample-scripts.js: Contains a deployment script for the Greeter Smart Contract
To deploy the Greeter, you should use the npx hardhat run command, which takes the script as the argument:
npx hardhat run ./scripts/sample-script.js
All contracts have already been compiled, skipping compilation.
Deploying a Greeter with greeting: Hello, Hardhat!
Greeter deployed to: 0x7c2C195CD6D34B8F845992d380aADB2730bB9C6F
This will successfully deploy the Greeter Smart Contract to the local in-memory Hardhat node. Keeping that in mind, let’s see how to set a more permanent solution so we can play around.
Open another terminal window and type in npx hardhat node. This will start a node against which we can run transactions. Now, edit your hardhat.config.js file and add the following to the module.exports:
{
	networks: {
		local: {
			url: 'http://127.0.0.1:8545'
	  	}
	}
}
To use the newly defined network, run the script with the following command:
npx hardhat run --network local scripts/sample-script.js
You’ll see logs popping up on the terminal which is running the Hardhat node.
How to use the tenderly export command to debug and profile local transactions
Now things are going to get exciting! Let’s make a small change to the sample script:
As you can see, we added lines 21 through 26, where we’re changing the default greeting. Let’s re-run the script: npx hardhat run --network local scripts/sample-script.js. You’ll notice the new transaction appears on the hardhat node terminal.
It’s time to export some transactions! Firstly, run the export init command to set it up:
tenderly export init
✔ Choose the name for the exported network: hardhat
✔ Super Awesome Project
✔ Enter rpc address (default: 127.0.0.1:8545):
✔ None
Finally, run tenderly export with the transaction hash and see the magic happen:
tenderly export 0x0c8cab68f5d84dfdc02c903ef8c9f26c957a8e788e8b398e462f459ae1f6da47
Collecting network information...

Collecting transaction information...

Collecting contracts...
Successfully exported transaction with hash 0x0c8cab68f5d84dfdc02c903ef8c9f26c957a8e788e8b398e462f459ae1f6da47
You can view your transaction at <https://dashboard.tenderly.co/MyAwesomeUsername/super-awesome-project/local-transactions/69d3194e-6cca-47d4-b875-41d11fea5701>
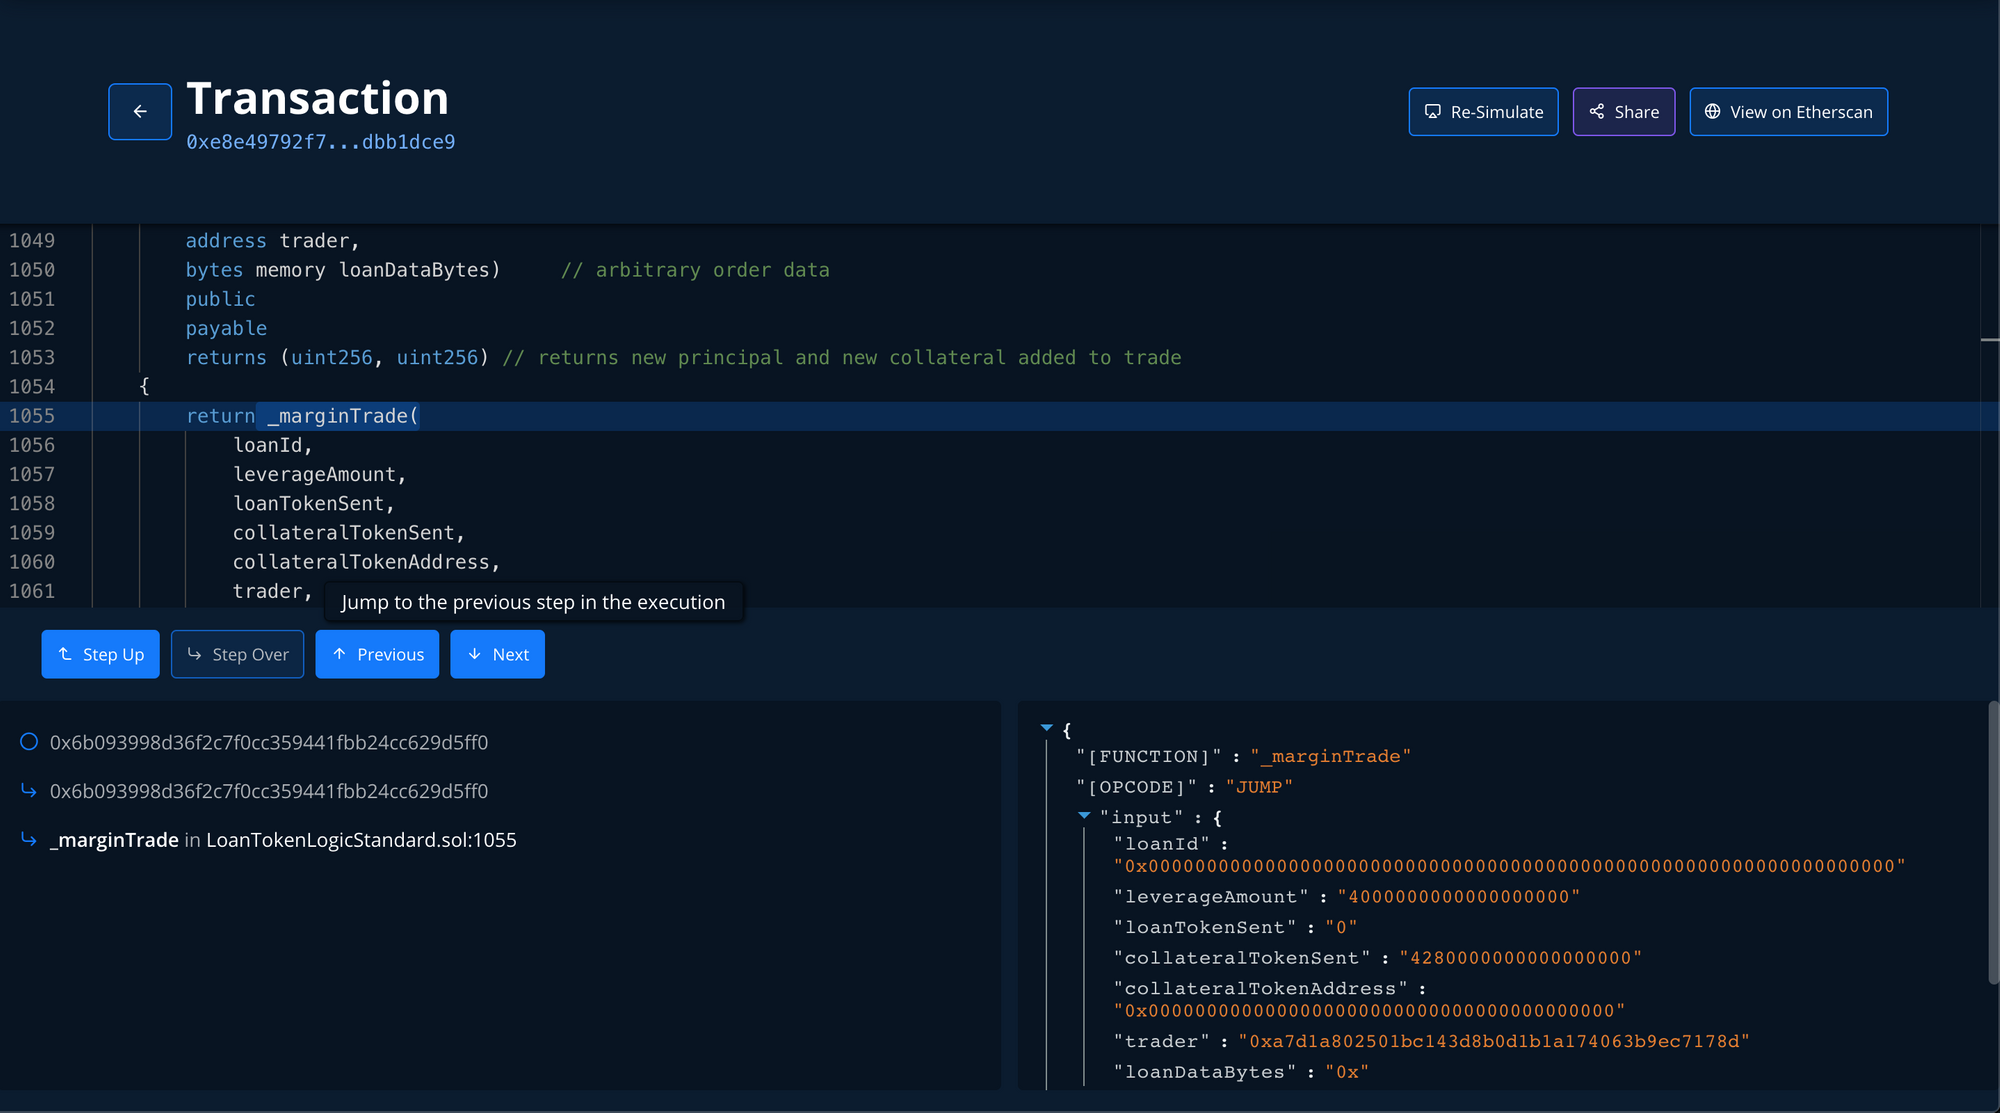
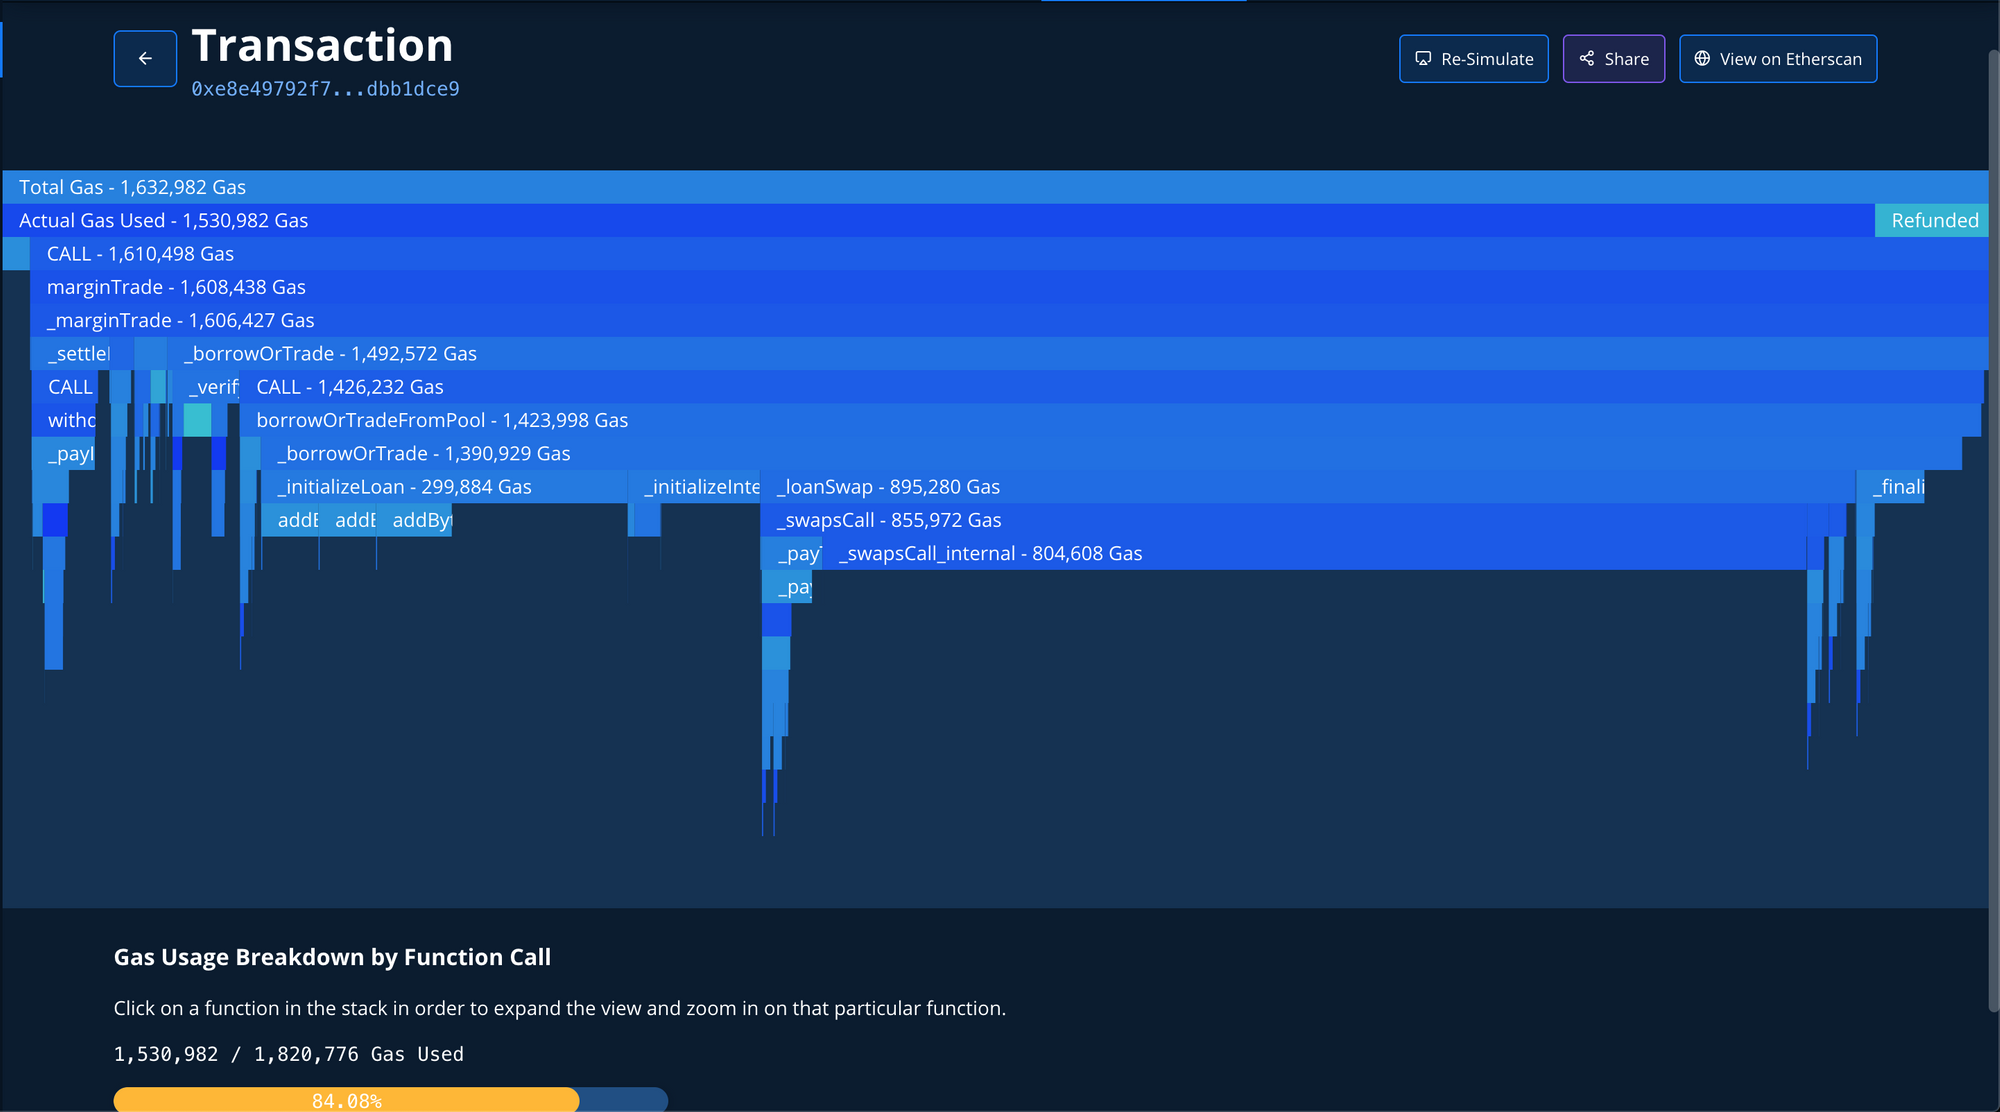
By clicking on the provided link, you’ll have access to all of the Tenderly tools you know and love for that local transaction!
How to push and verify Smart Contracts with the hardhat-tenderly tasks
Let’s say that we’re happy with our Greeter and want to test it out on a testnet. I’ll be using the Kovan testnet. To set it up, we’ll once again edit our hardhat.config.js file and add a new entry to the networks map:
{
    networks: {
		local: {
			url: 'http://127.0.0.1:8545'
		},
		kovan: {
			url: '<link-to-node>',
			mnemonic: '<mnemonic-phrase>'
		}
	}
}
To deploy the Smart Contract, we will run the script again, but with a minor change:
npx hardhat run --network kovan scripts/sample-script.jsAs you can see, we need to set kovan as the target network for the script. Once the deployment is done, we will copy the outputted address and use it with the verify command:
npx hardhat --network kovan tenderly:verify Greeter=0x6f49F890B6B10AA49AF925625662439db6E8aFb8
If we navigate to the Smart Contracts page, we’ll see we’ve successfully done the verification! Note that you can provide multiple Contract=Address pairs separated by a space character.
The push and verify commands are similar at first glance, but they’re quite different:
- tenderly:verify: Publicly verifies the contracts for all Tenderly users. This means that everyone has access to the source code of this Smart Contract
- tenderly:push: Privately adds the contracts to the project defined in hardhat.config.js. This means no one except the people with access to the project can see the source code of this Smart Contract
How to push and verify Smart Contracts directly through code
You might be thinking to yourself: “Verifying and pushing Smart Contracts after each deployment is quite repetitive and prone to errors!”. You aren’t far from the truth. That’s why you can verify and push contracts directly inside of your Hardhat scripts!
If you look at line 26, you’ll see that with a simple tenderly.verify() or tenderly.push() call we can verify/push (multiple) Smart Contracts!
The Teaser
We covered a lot of things in this article. But before you go, I would love to tease a feature coming to a development environment near you.
Many people are using the Tenderly Simulate feature to see what a transaction would do if submitted on-chain in the next block, or what would've happened if the parameters or state was changed in a historical block. It is even consumed by numerous teams via the Simulate API.
We'll soon be going a step further: You will have the ability to chain multiple simulations together and even fork at specific points. This will allow you to run elaborate test scenarios, try out multi-step transaction schemes, and so much more! I'm looking forward to sharing more details with you soon!
Thanks for staying with me until the end of this article. As always, you can reach us on Discord or over at support@tenderly.co. Talk to you soon!
Subscribe to our newsletter