On-chain alerting and monitoring systems often lack flexibility and customization options, making it difficult to tailor monitoring operations to specific use cases. These limitations can delay your responses to critical on-chain events or cause you to lose valuable insights on dapp performance.
Tenderly webhooks address these challenges by giving you a more advanced mechanism for streaming data about on-chain events in real-time. As an alert destination, webhooks allow you to receive alert data in JSON format via POST requests at a custom webhook endpoint. This can help you establish a more connected and synchronized monitoring setup for your dapp.
Let’s dig deeper into how to get the most out of Tenderly webhooks!
What can you do with Tenderly webhooks?
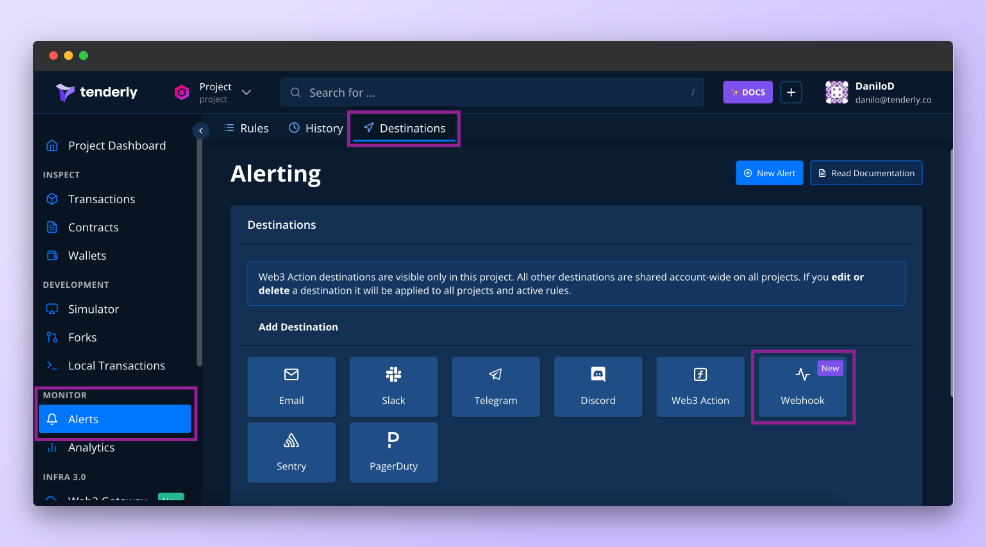
Tenderly webhooks are available within Tenderly Alerts as an alert destination. They work like any other standard webhook – automatically feeding dapps real-time data about on-chain events.
You can use Tenderly webhooks to receive data about any event related to your wallet or smart contract as it happens. With 12 versatile alert types to choose from, you can track successful or failed transactions, state changes, token transfers, individual smart contract functions, and to name a few.
Tenderly sends this event data to your webhook endpoint via a POST request with a JSON payload. This makes for easier real-time monitoring, seamless scalability for high-volume dapps, and faster integration into existing dapps to enable automation.
Here are a few examples of when you might want to use Tenderly webhooks in your dapp:
Ensure system integrity
Webhooks can be used in various ways to ensure your system is functioning as intended.
For example, if you run Oracles, you can set up alerts to monitor their availability. If an Oracle stops sending data, this is a mission-critical event that could negatively impact the integrity of your systems. Webhooks enable you to receive alerts about such events in real-time and take action immediately.
In decentralized exchanges, webhooks come in handy when you want to keep tabs on major token transfers. If a big token sale happens on one exchange, you can use Alerts to monitor other exchanges and pool the data. This data can then be sent via webhooks to your systems for data comparison, enabling you to take appropriate steps to maintain the value of the token.
LI.FI, a cross-chain bridge aggregation protocol, relies on Tenderly webhooks to ensure the reliability of the systems. Their development team implemented Tenderly webhooks as a solution for categorizing failed transactions.
“Having deployments on more than 16 chains makes it difficult to monitor failed transactions. What Tenderly webhooks allow us to do now is to quickly fetch failed transactions, categorize them by failure reason, and analyze them locally. This has made the entire investigation process much much easier and faster for our devs, so they can focus their time on coming up with solutions.” - Max Klenk, Co-Founder & CTO at LI.FI
React to on-chain events
Another common use case for Tenderly Alerts is to make it easier to stay informed about and react to on-chain events. Webhooks make this process more automated, reducing the time it takes you to react to something happening on the blockchain.
For example, if you’re one of the key holders of a multisig wallet, you can use webhooks to automatically send a transaction when enough votes have been cast. This removes manual steps when sending transactions from a multisig.
In addition to this, webhooks can also be used to trigger certain actions in your internal systems, such as updating an internal database when an event happens. For example, this could involve tracking and categorizing failed transactions in a centralized database.
Send real-time notifications to dapp users
Webhooks can improve dapp UX by enabling you to send real-time notifications and relevant updates to users about on-chain events.
For example, when a transaction is sent, the data about its status and other information can be sent to the dapp via webhook, processed, and relayed to the user in the form of a user-friendly notification. Notifications can also be sent directly to a Discord webhook or other messaging services.
Setting up Tenderly webhooks as an alert destination
The flow for enabling a webhook as an alert destination goes something like this:
- Create a Tenderly project or use an existing one
- Select one of the 12 alert types
- Select Webhook as the Alert destination
- Add in your custom webhook URL
Webhooks can be set as the destination for multiple alerts. This allows you to receive data coming from multiple alerts through a single webhook URL.
Let’s see this in action by creating an alert to monitor successful transactions emitted from a smart contract. When a successful transaction happens, Tenderly will send the data about the event in JSON format to a custom webhook URL.
1. Create the Successful Transaction alert type
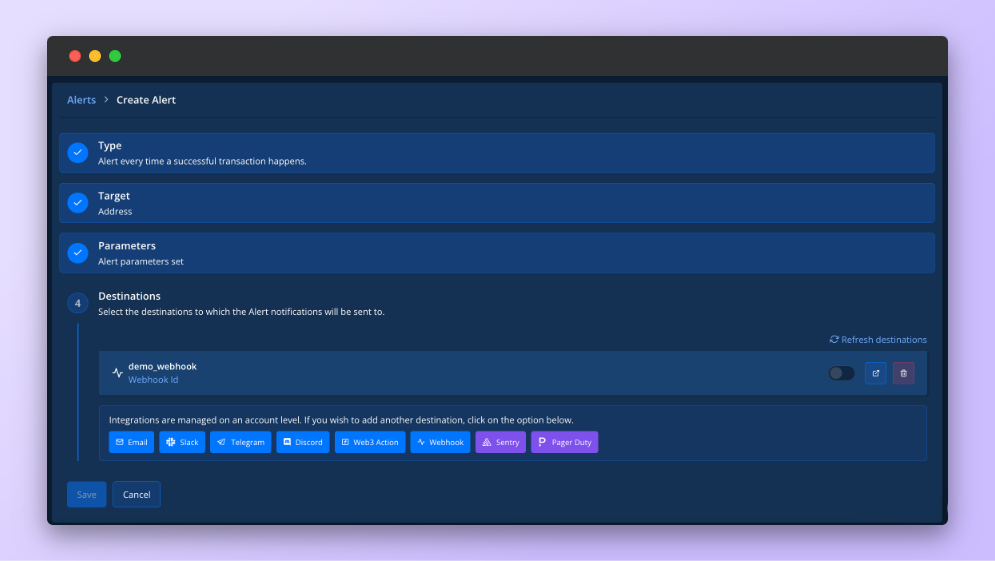
Webhooks are project-scoped, meaning the same webhook destination can only be accessed from within the project it was created. This is important if you want to set up multiple alerts to send data to the same webhook.
- From the Dashboard, go to Alerts → New Alert → Type: Successful Transaction.
- Set address as the alert Target since we want to monitor successful transactions coming from a single smart contract.
- Select a smart contract or wallet address that you added to your Tenderly Project. If you don’t know how to add smart contracts and wallets to a project, please follow the guides linked here.
- From the available destinations, select Webhooks.
2. Configure and test webhooks as an alert destination
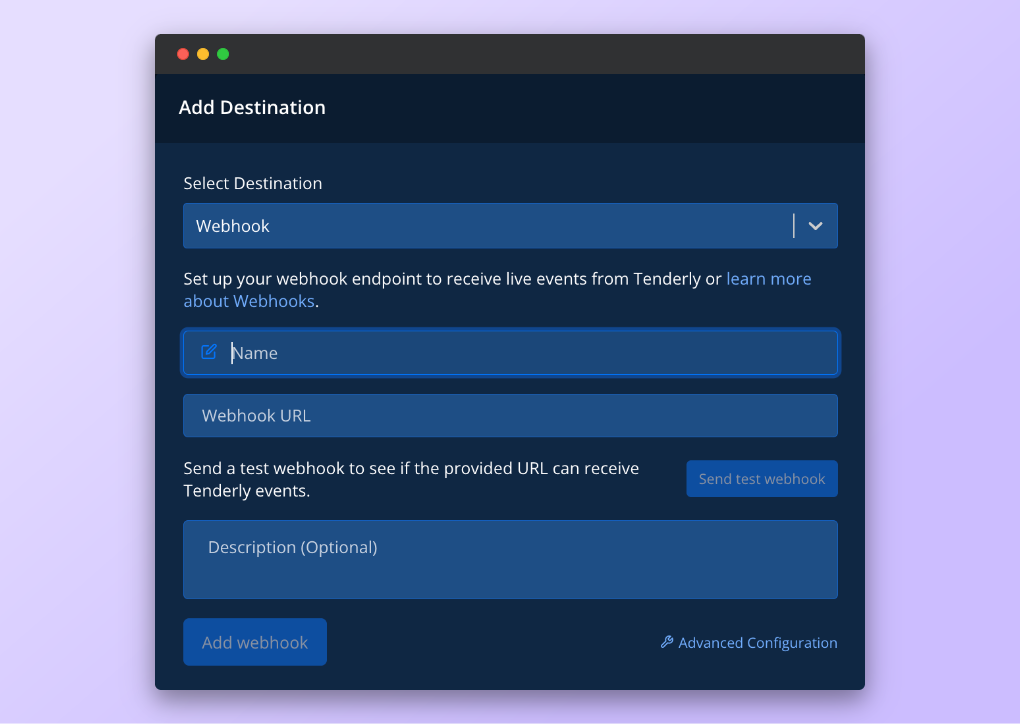
- Give your webhook a name to keep things organized.
- Paste your URL in the Webhook URL field.
- Give the webhook a description if you want in the Description field.
- Click the Send test hook button to test if your webhook is working. If everything is set correctly, you should receive data on your webhook similar to this:
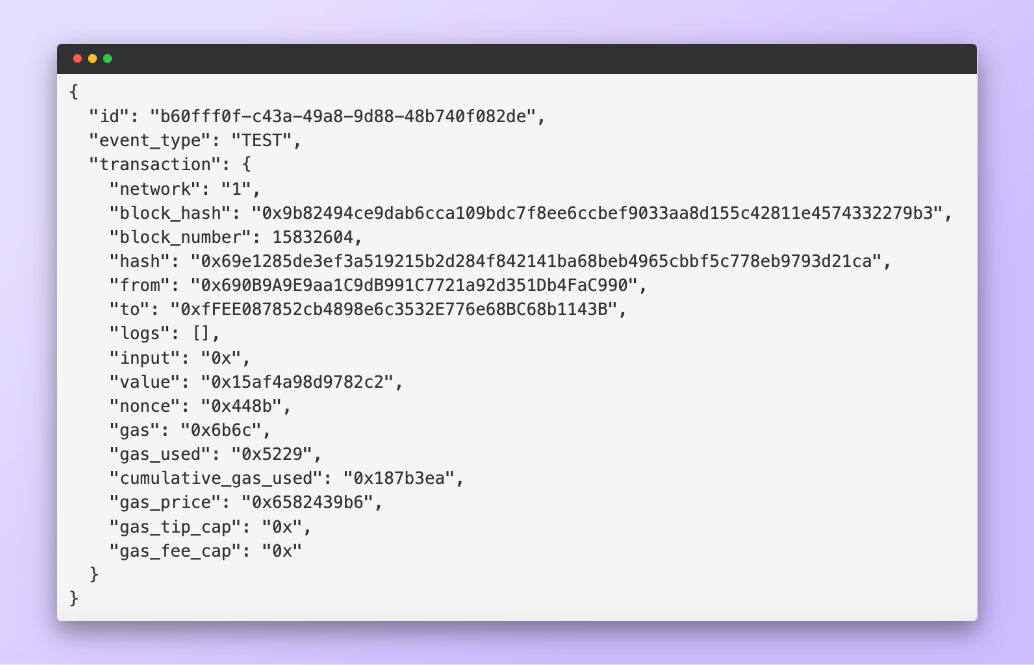
- Click Add Webhook to enable webhooks to receive data about the successful transactions for the smart contract.
- Finally, click Save to enable the Alert.
3. Creating a custom webhook endpoint
While setting up your webhook, you’ll notice an Advanced configuration link in the setup wizard. Clicking this link will open up code snippets for Javascript, Python, and Go that allow you to create custom webhook endpoints to receive notifications.

Taking the Python snippet as an example, the provided code gives you everything you need to quickly deploy a Flask app to receive webhook data from Tenderly. You can read the code comments to get more context about what each line of code does.
That’s all it takes to configure an alert and set webhooks as the alert destination. If you want to learn more about the different types of alerts and what you can do with them, these helpful resources will come in handy:
Create your first Tenderly webhook
Ready to start using webhooks? Head to the Tenderly dashboard, choose an alert type that best fits your needs, and set the alert destination as “Webhook”.
If you need more guidance, we have a detailed tutorial about setting up webhooks to help you get going. Check it out here: How to Use Webhooks for Alerting.
