The node infrastructure powering your dapp plays a critical role in its success and potential for mass adoption. If your dapp requires fast and reliable production node infrastructure, Tenderly Node has you covered.
Built to deliver 100% data consistency, Tenderly Node gives your read-intensive dapps uninterrupted access to the Mainnet and supported testnets with instantly synced data.
Accessing any of these networks is as easy as copying and pasting a single RPC URL into your code. Or you can use our Request Builder to generate custom code snippets for different languages and add them to your project.
Use the newly released Tenderly Node Extensions to customize how you interact with the blockchain through Tenderly Node. Create custom RPCs that go beyond the standard set of APIs.
Try Tenderly NodeUnlock free Tenderly Node access
As soon as you create a free Tenderly account, you'll have immediate access to Tenderly Node, fully configured and ready to use. You’ll also get 25 million Tenderly Units (TU) per month, allowing you to perform read, write, and compute operations for free. Learn more about Tenderly Node usage and rate-limiting here.
Tenderly Node delivers a plethora of benefits, including:
- Up to 8x faster read-heavy workloads
- 100% consistent read access
- Free access to historical data
- Integrated with Tenderly’s development, debugging, and testing tools
- Custom RPC endpoints for simulating individual and bundled transactions
- UI-based RPC request builder and request preview
Tenderly’s development tools and observability stack have become an essential part of our flow these past few years. And now, with the fast and reliable Tenderly Node, Tenderly really makes all aspects of our development process as easy as possible. - Samyak Jain, Co-Founder and CTO at Instadapp
Watch this quick demo video on how to create a custom code snippet for accessing the Mainnet and reading on-chain data.
Getting started with Tenderly Node in 3 easy steps
We’ve made it extremely easy to start using Tenderly Node. With minimal setup and no upfront costs, getting started is as easy as copying and pasting a code snippet with an RPC URL into your project.
Here’s how to get started with Tenderly Node in three easy steps.
Step 1: Open Tenderly Node from the Dashboard
First, log into your Tenderly account and navigate to Tenderly Node from the dashboard by clicking Node on the left-hand menu. Or you can click this link to go to Tenderly Node directly.
Everything you need to create requests, monitor usage, and manage access to your node is nicely organized on this page.
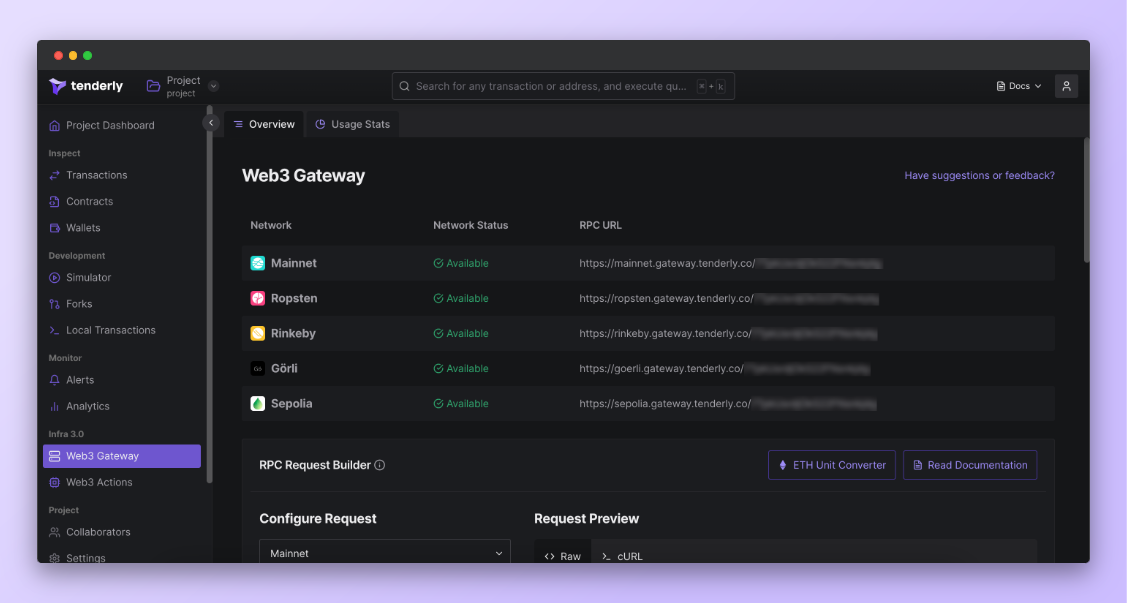
Once you’re in, you’ll notice that the Tenderly Node dashboard is divided into three sections: Networks, RPC Request Builder, and Access Controls.
- The Networks section contains a list of all the support networks along with the RPC URLs, which you can add to your dapp's source code directly to access that particular network.
- The RPC Request Builder gives you an easy way to define the parameters for your request, test-run the request, and analyze the returned data as a response. You can do all of this from your browser. In the next step, we’ll cover all the Request Builder options in more detail.
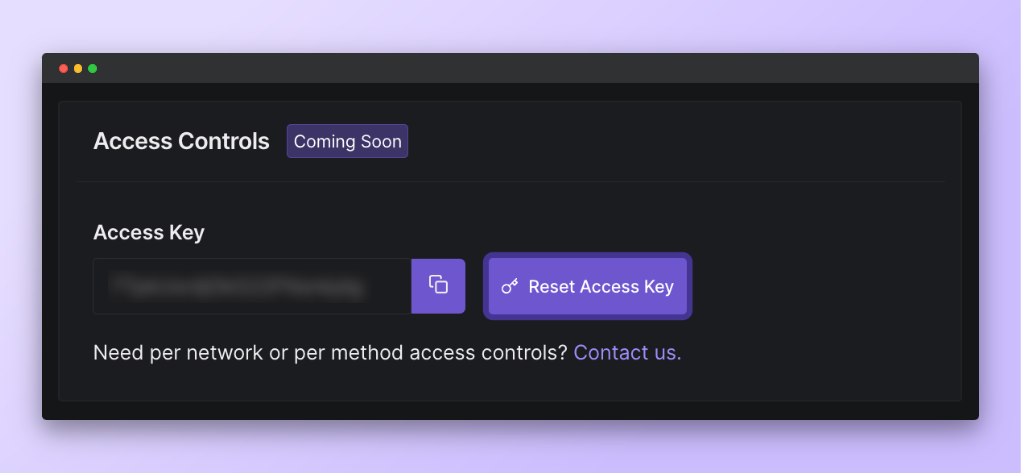
- The Access Controls at the bottom of the page allow you to easily copy, manage, and reset your access key with a single click.
Step 2: Configure your request and copy the code snippet
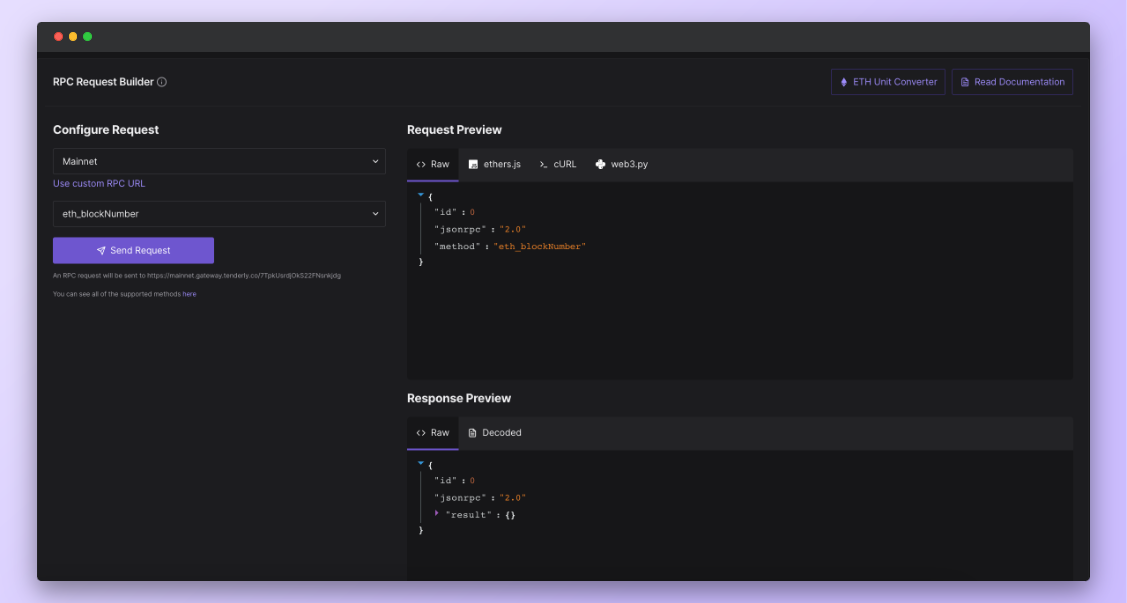
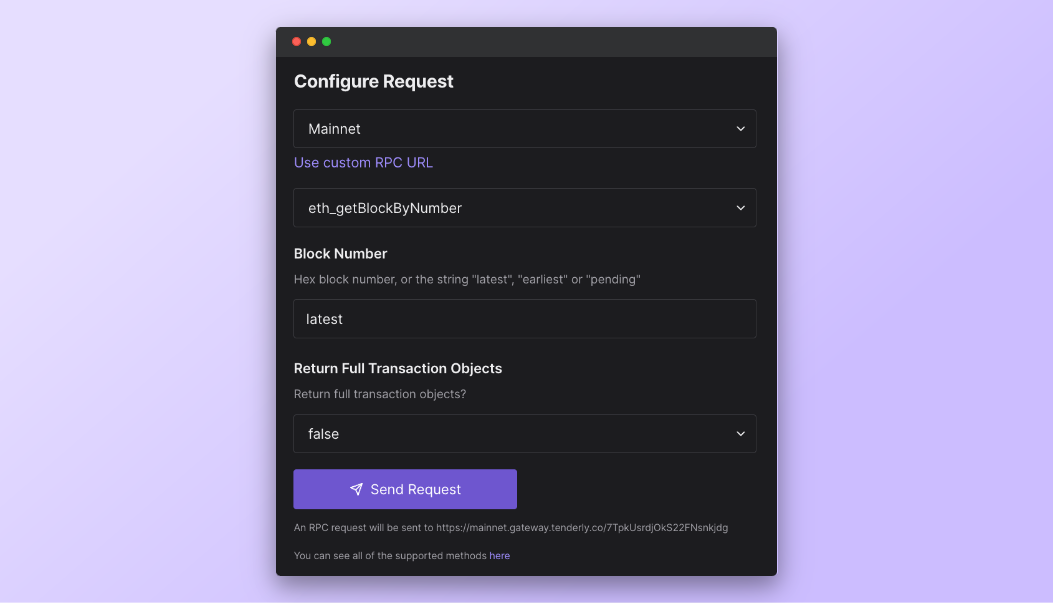
The RPC Request Builder is where the magic happens. This section has three panels with options to define your request, test it out and analyze the data, and auto-generate code snippets that you can insert into your dapp.
Configure Request: This is where you configure your request by selecting the desired network, method and defining other parameters specific to the method you selected. For a detailed explanation of each method, you can check out the documentation, where you’ll find a list of all available methods along with their specific parameters.
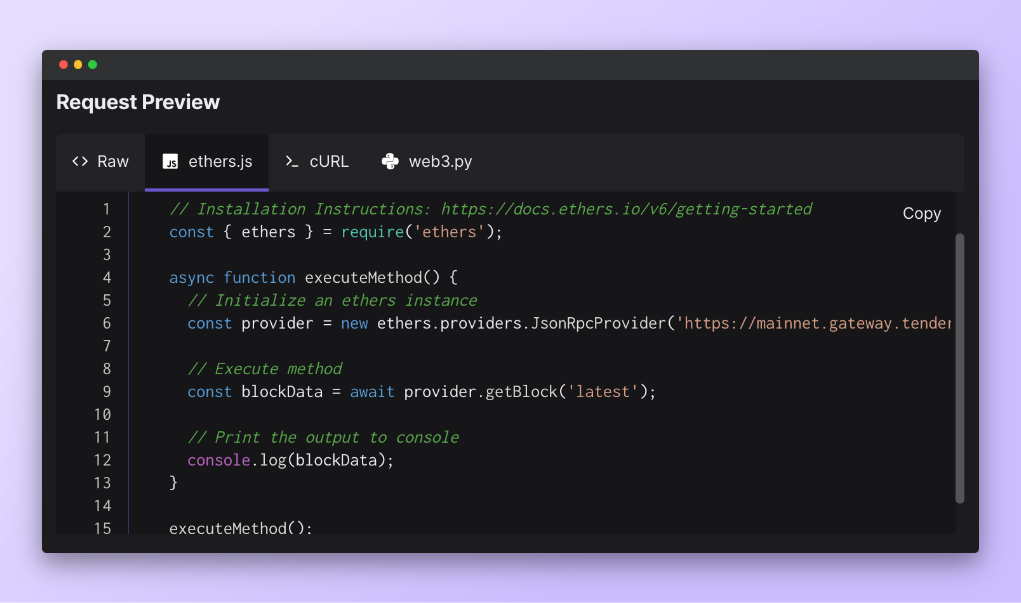
Request Preview: Once you’ve defined the parameters for your request, Tenderly will automatically generate the code snippet for that request. You can copy and paste this code into your project and start making calls to the RPC URL.
Depending on the language and architecture of your dapp, we give you the option to choose between using the raw request data, Ethers.js, cURL, and Web3.py snippet versions of the request.
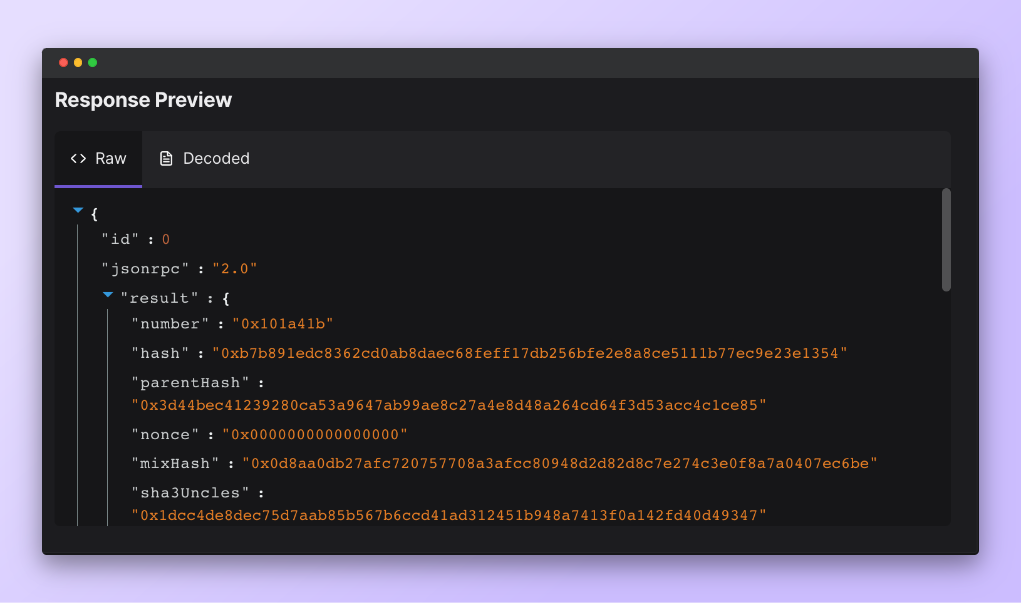
Response Preview: If you want to test-run your request and see the results, you can send the request directly from your browser by clicking the Send Request button.
The response will be displayed in the Response Preview panel in its raw and decoded form. Even though this is a preview, the data that you get back is queried from the blockchain and is accurate.
Step 3: Add the code snippet to your dapp and monitor usage
The final step is to copy the code snippet from the Request Preview and paste it into your code.
In case you accidentally expose your secret API key, or if it gets compromised in any way, you can reset it with a single click from the Access Controls section located below the RPC Request Builder.
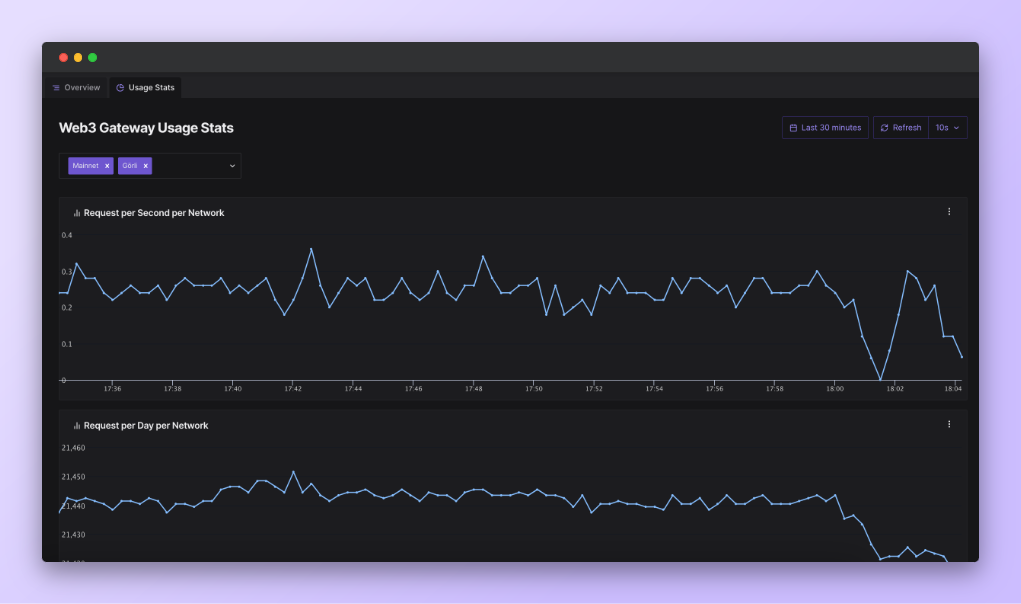
To keep track of your Tenderly Node usage, click on the Usage Stats from the menu at the top of the page.
Here, you can monitor the requests you’re making per network, filter usage stats based on different time intervals, view the number of failed requests, and more.
Simulate transactions in Tenderly Node before sending them
In addition to standard RPC endpoints, Tenderly Node gives you access to custom Tenderly RPC endpoints that enable you to simulate and preview the outcome of transactions before sending them on-chain.
tenderly_simulateTransaction: Simulate individual transactions against the latest state. This custom RPC method is available through JSON-RPC and in the Dashboard Request Builder.tenderly_simulateBundle: Simulate sequential transactions against the latest state. This method is available through JSON-RPC only.
These custom methods allow you to simulate transactions through Tenderly Node. Once you’re happy with the simulation results, you can use the same RPC URL to send the transactions, as well as submit read calls and check balances.
Check out the documentation to browse through all the standard and custom endpoints in Tenderly Node.
Get started with Tenderly Node
When you create a Tenderly account, we’ll automatically set up the RPC URLs for each supported network, as well as the access keys. This means you can integrate Tenderly Node into your code right out of the gate without any additional setup steps.
Get started by launching Tenderly Node.