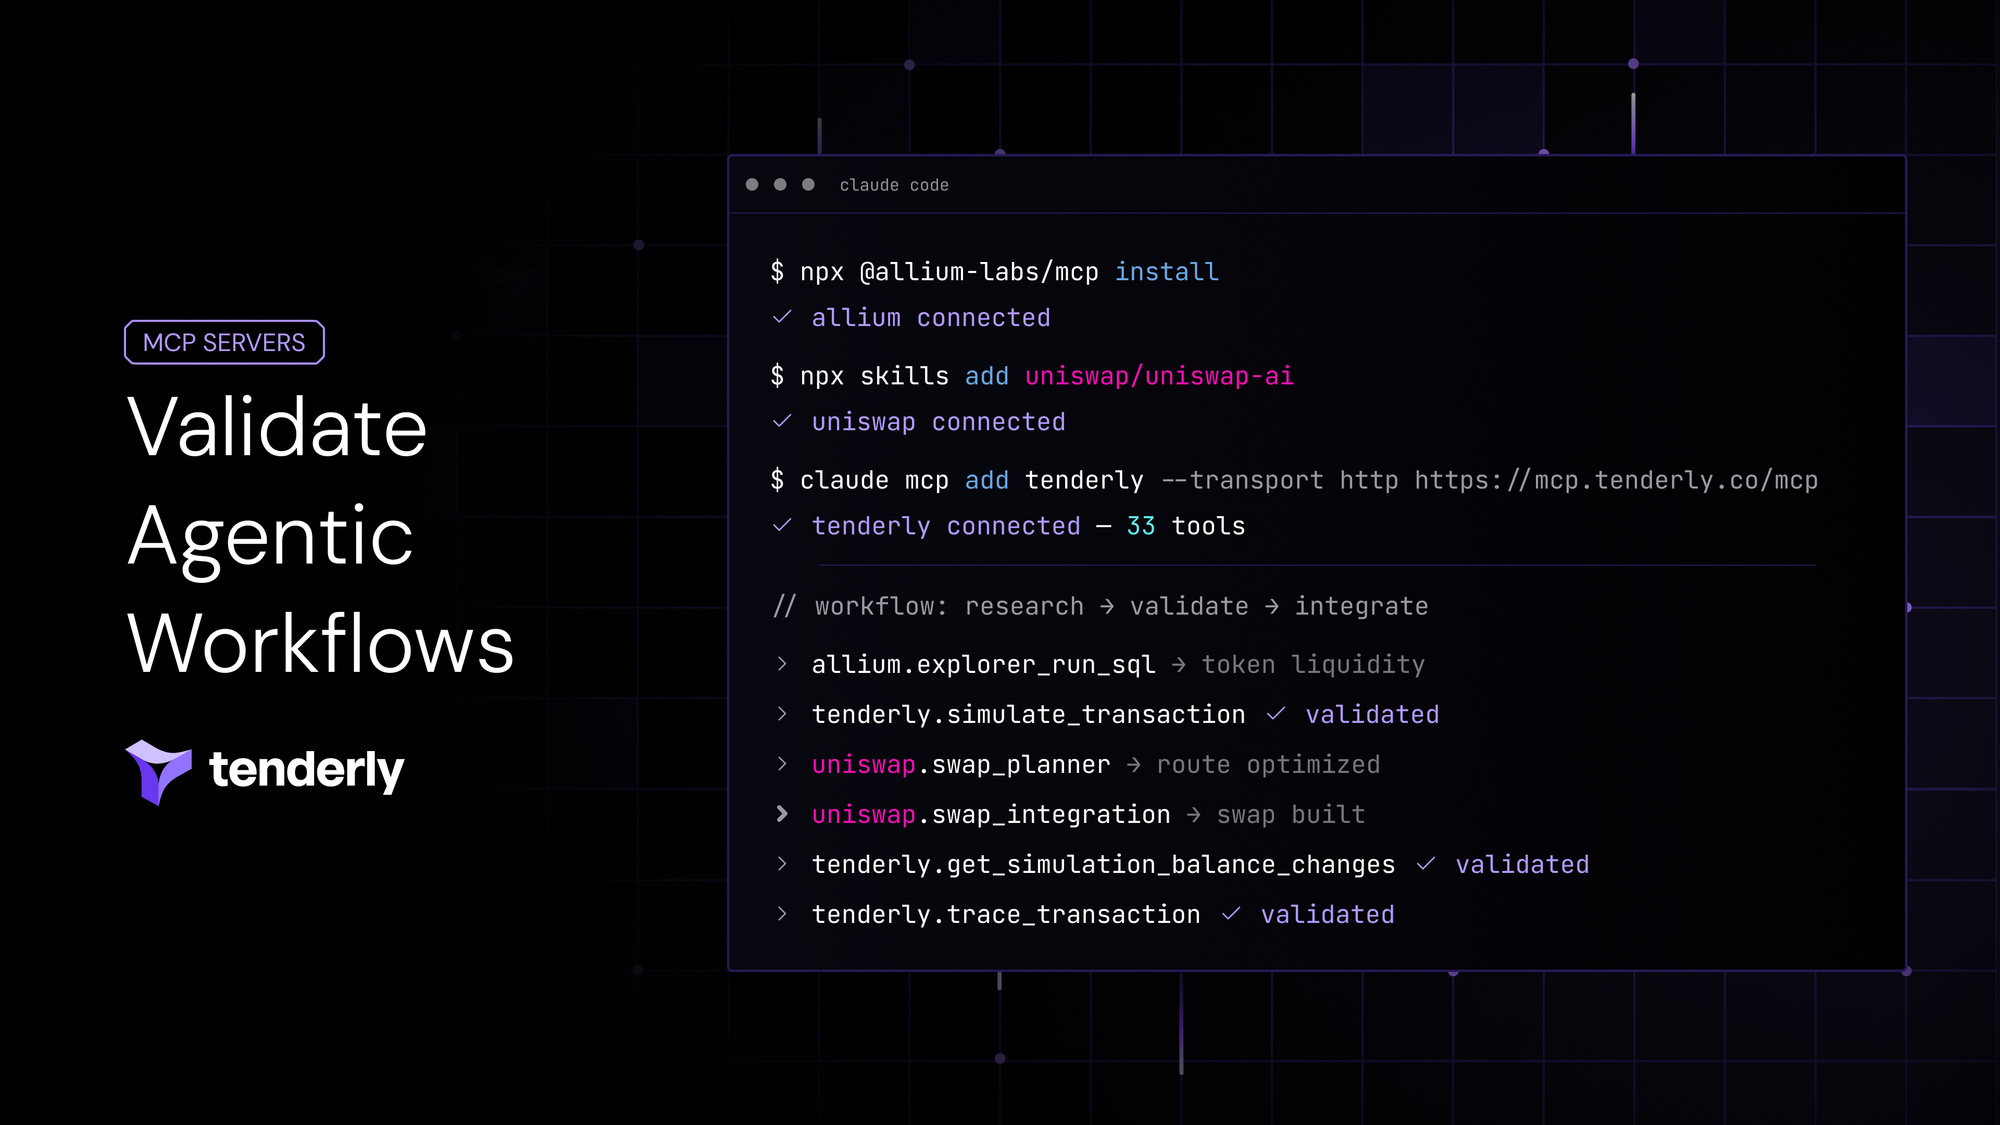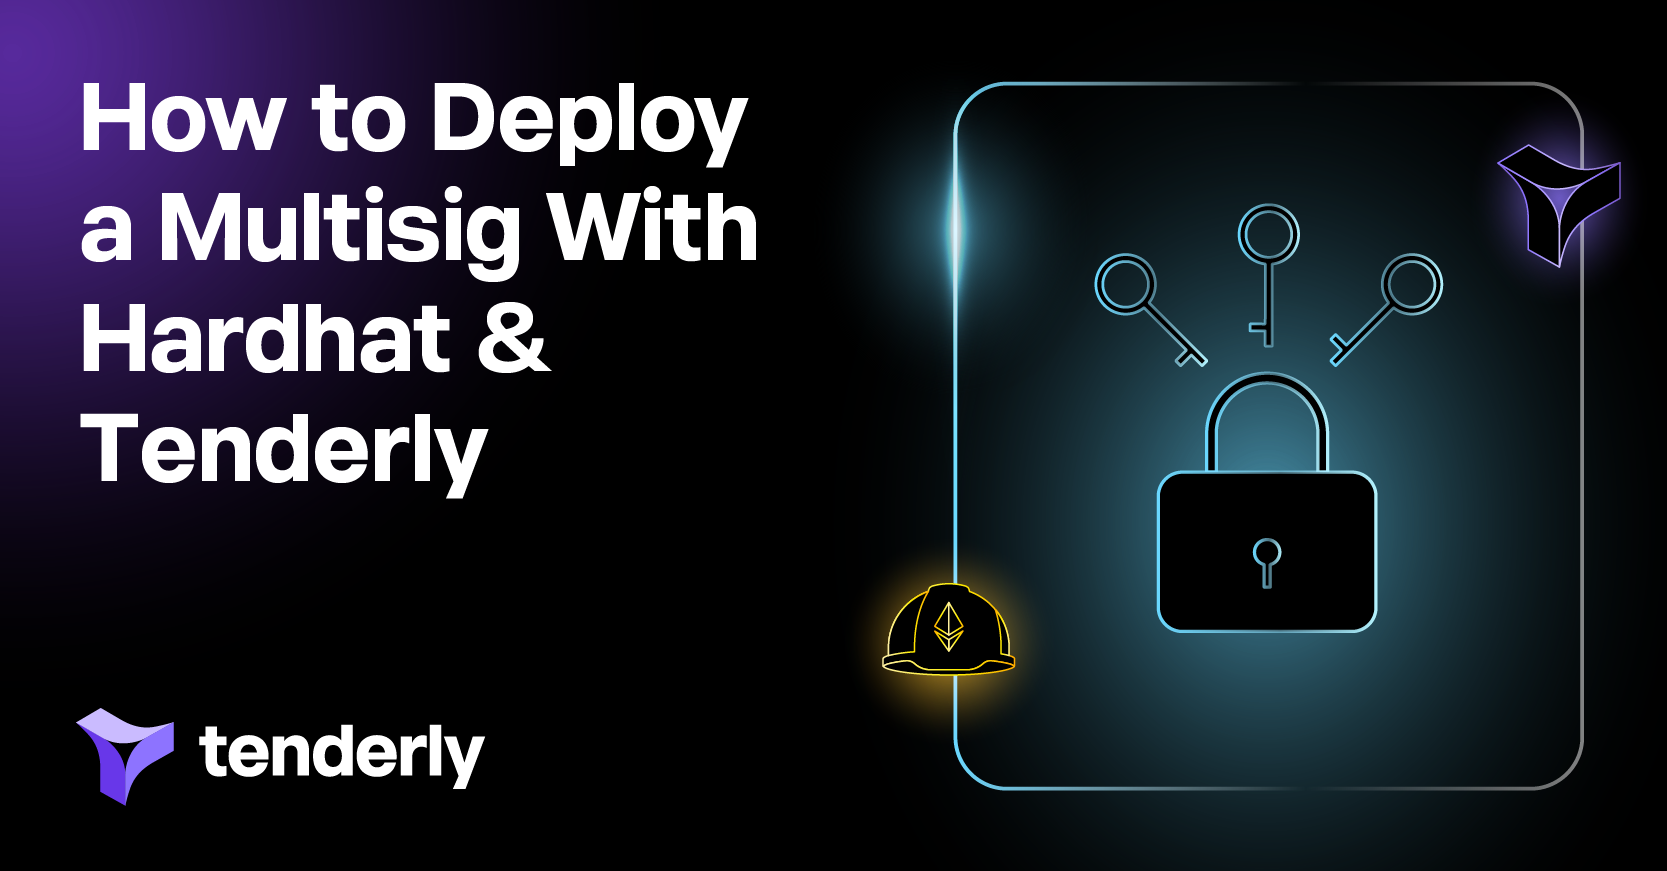
In this tutorial, you’ll learn how to create and use a multisignature (multisig) wallet. A multisig wallet provides extra security and better control over your assets because two or more individuals must agree to execute a transaction. It’s actually a smart contract that executes transactions only after several parties agree on and sign their execution.
Prerequisites: For this tutorial, you should have your MetaMask wallet in place, be familiar with deploying contracts through Hardhat, and have a Tenderly account already set up. If you don’t have a Tenderly account, you can set it up for free in just a few clicks.
But first things first, let’s learn a bit more about what multisignature wallets are before we move on to the practical part. If you’re already familiar with the concept, feel free to skip this section.
What is a multisignature wallet?
A standard crypto wallet stores one private and one public key for signing and validating cryptocurrency transactions. A multisignature wallet, on the other hand, requires two or more private keys to access, sign, and send transactions.
This is especially beneficial when multiple parties access the wallet regularly, so you’d like to establish greater control over transaction execution. This way, the involved parties need to ensure group agreement before executing transactions.
In particular, organizations such as DAOs can benefit from this type of wallet. Multisig wallets enable DAOs to implement a democratic voting mechanism and prevent the execution of unauthorized transactions or proposals. For instance, DAO stakeholders might be required to reach three out of five votes to execute a transaction.
How do multisignature wallets work?
At its simplest form, a multisig wallet is a smart contract with a list of owner accounts and the required number of confirmations. You define both elements when creating the contract. The owners can submit, approve, and execute transactions if and only if the required number of owners agree on a transaction.
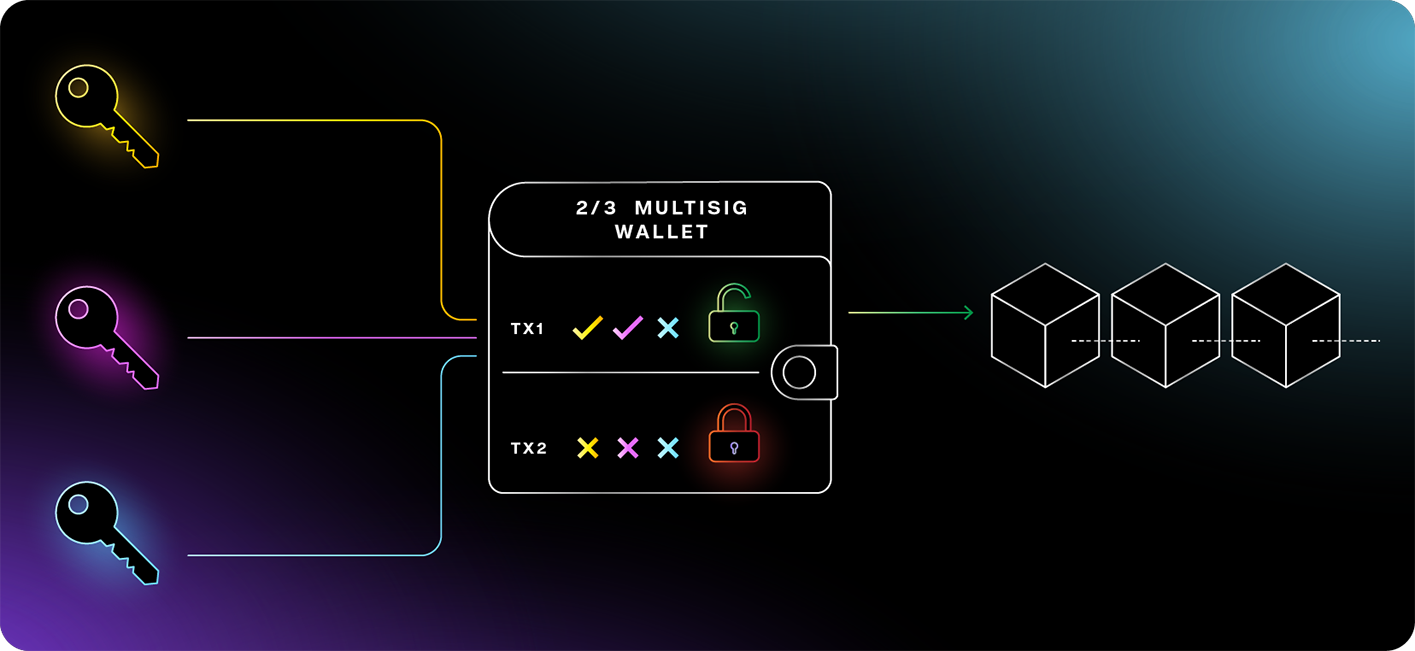
Here’s how a multisig wallet works in more detail:
- Any of the multisig owners can submit a transaction for approval. The multisig wallet stores the transaction for approvals.
- The owners can approve a transaction by sending transaction confirmations, tracked by the smart contract. In other words, several owners sign the transaction, hence the multisig name.
- If the required number of confirmations is submitted for a particular transaction, the owners have reached an agreement and one of them can execute the transaction.
- Attempting to execute a transaction with an insufficient number of confirmations results in an error.
For example, a 4/4 wallet is shared by four people and requires all four signatures to sign a transaction. Alternatively, a 2/3 multisig wallet is shared by three people and requires two transaction confirmations.
Now that you’re familiar with the basic concepts of multisig wallets, let’s get into their code and the steps needed to build, deploy, and use one.
1. Get familiar with Tenderly Web3 Gateway
Tenderly Web3 Gateway allows you to quickly and easily send transactions or query the blockchain using an RPC URL. We’ll use it to deploy the multisig smart contract. So, once you log into or set up your Tenderly account, navigate to the Web3 Gateway page.
In this tutorial, we’ll use the Sepolia testnet, but feel free to use a different one if you’d like.
On the Web3 Gateway page, find the Sepolia RPC URL in the list of supported networks and copy it.

ℹ️ Note: Make sure not to share the URL with anyone because it contains your security access token. But no worries if you expose the token. Just go to the Access Control section to reset it.

2. Get test ETH from a faucet
We need to pay gas fees when deploying smart contracts or executing transactions. To avoid paying actual ETH, we use the Sepolia testnet where we can pay gas fees in test tokens. So, let’s use the Sepolia faucet to get some test ETH for this tutorial.
You can also get testnet funds for Goerli if you decide to go with this network instead.
3. Use a sample Hardhat project
We included a sample project that demonstrates how to deploy and test a multisig wallet using a Tenderly Fork as a development and testing network. Use this example Github repo to follow along. Use this command to clone it and change into multisig-wallet folder:
git clone git@github.com:Tenderly/tenderly-examples.git

cd multisig-wallet
3. 1. Set up environment variables
Next, set up the environment variables by copying the .tpl.env template to the .env file:
cp .tpl.env .env
To configure the Hardhat project, you need to:
- Fill in
SEPOLIA_RPCin the.envfile with the RPC URL you got in step 1. - Get the project slug and username and fill in
TENDERLY_PROJECT_SLUGandTENDERLY_USERNAMEin the.envfile. - Get the Tenderly access key and fill in
TENDERLY_ACCESS_KEYin the.envfile. - Get your account’s private key from MetaMask, paste it to the
.envfile asSEPOLIA_PRIVATE_KEY_1, and uncomment the line 23 inhardhat.config.ts. This private key will be used to deploy the multisig contract.
ℹ️ The .env file will hold your sensitive information such as API keys and wallets’ private keys. Don’t worry, it’s git-ignored, so it stays private! The information from the .env is made available to hardhat.config.ts via dotenv package.
3. 2. Install the project dependencies
First, install the dependencies of the sample project:
yarn
3.3. Deploy the smart contract
In this step, you can either create a JS script to deploy the multisig wallet or you can use the deployment script 1-deploy-multisig.ts provided in the sample Hardhat project. Make sure to follow the TODO instructions in this file or create the deployment script from scratch:
touch scripts/deploy.js
Now paste the following code to the file you just created:
const { ethers } = require("hardhat");
require("dotenv").config();

async function main() {
  // Get the deployer wallet - this will be based on the private key we set up in config
  const deployer = ethers.provider.getSigner().getAddress();

  // MultiSigWallet will be an ethers internal representation of the compiled contract
  const MultiSigWallet = await ethers.getContractFactory(
    "MultiSigWallet",
    deployer
  );
  console.log("Deploying MultiSigWallet...");
  // This array contains the public addresses of the wallet owners.
  // These two addresses will both need to sign a transaction.
  const owners = [
    "0x...", // TODO: edit here
    "0x...", // TODO: edit here
  ];

  // multisig will be the instance of our contract that we are about to deploy
  // owners is the array that contains owner addresses
  // 2 is the number of confirmations required to send a transaction

  const multisig = await MultiSigWallet.deploy(owners, 2);
  // We wait for the deployment to be completed and confirmed

  await multisig.deployed();
  // This will tell us the address at which the contract was deployed
  console.log("Multi Sig Wallet deployed to:", multisig.address);
}
// Do the thing!
main()
  .then(() => process.exit(0))
  .catch((error) => {
    console.error(error);
    process.exit(1);
  });
Look for the “TODO” comments in the code and insert two addresses. Each of these addresses will “act” as an owner of the multisig wallet.
You can simply copy the addresses from your MetaMask. If you need a second address, go to MetaMask and create a second account. Just click the top-right icon in MetaMask and then Create Account. And voilà, you now have two wallet addresses.
Note that we’re using our public address here, not our private key.

With everything in place, run the script:
npx hardhat run --network sepolia scripts/deploy.js

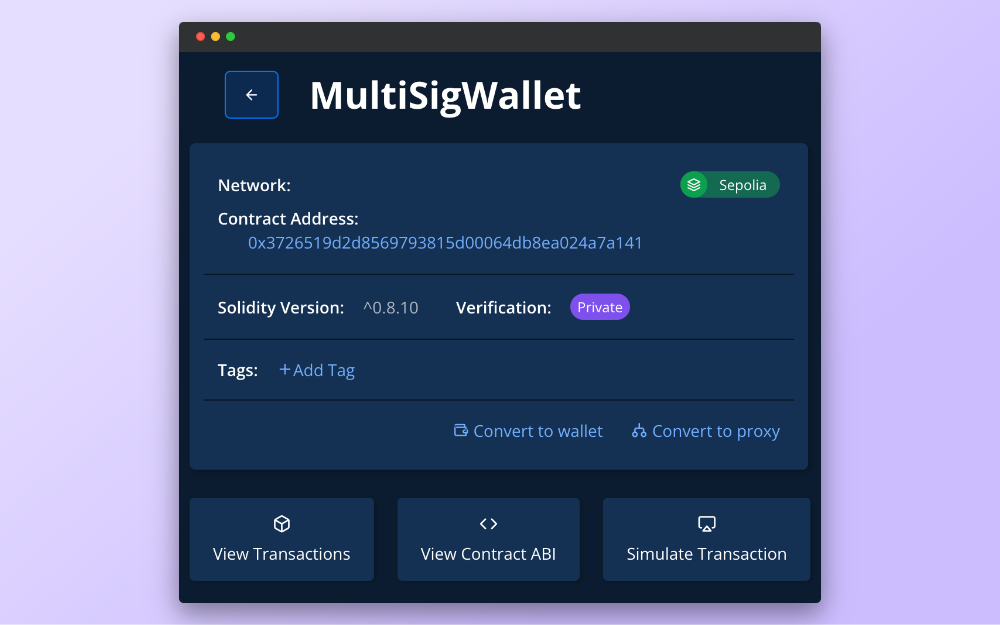
Aaand we’re live! 🎉 You deployed and automatically added your multisig contract to Tenderly. Now go to the Tenderly Dashboard, click Contracts in the navigation menu on the left, and your contract should be there.
ℹ️ This sample project uses the hardhat-tenderly library. It’s set up so that any contract you deploy is automatically verified on Tenderly.

Now, let’s have some fun!
3.4. Fund the multisig wallet with test ETH from MetaMask
When executing a multisig transaction, it’s actually funded by the multisig wallet balance. So, before sending transactions through our newly deployed multisig wallet, we first need to fund it with Sepolia’s test ETH.
First, copy the multisig wallet address from the Tenderly Dashboard by clicking Contract Address.
Next, open MetaMask, click Send, and paste the wallet address to the Send to field. For testing purposes, let’s send 0.1 ETH. Then, click Next and Confirm in the next window.
After the transaction succeeds, go back to the Contract page, click the View transaction button, and you should see the transfer. You can also go to the Sepolia testnet explorer, search for the wallet address, and you’ll see that your contract now has a balance of 0.1 ETH.

4. Test the multisig wallet functionality with a Tenderly Fork
Now that we added funds to the multisig wallet, let’s test it out and transfer 0.1 ETH. But to do this successfully, the two wallet owners need to agree to this. Here are the steps we need for a multisig-approved transfer of 0.1 ETH:
- Create a transaction object representing the transfer of 0.1 ETH to an arbitrary recipient.
- Submit the transfer transaction to the multisig wallet.
- Have owner 1 confirm the transfer transaction.
- Have owner 2 confirm the transfer transaction.
- Execute the confirmed transfer transaction.
In total, we have to execute five transactions. But if only you didn’t have to wait every time you sent a transaction to a testnet because of network congestion. We feel ya – waiting to complete a simple test can be really frustrating. Even if you’re willing to wait, you should be sure your transaction goes as planned before you spend gas and test ETH on executing it on an actual network.
And yes, we have a solution (which you probably already guessed, but we had to set the scene – sorry not sorry). So, we present to you the alternative – using a Tenderly Fork for testing.
Why test the multisig functionality on a Tenderly Fork
A Tenderly Fork is a lightweight simulation of a selected network, which is Sepolia in this case. You can use a Fork as your personal development, research, and testing environment. Unlike a testnet, it’s private, fully customizable, and really (really!) fast.
Running a transaction on a Tenderly Fork shows you how the transaction would roll out if sent to an actual network. But, instead of executing a transaction for real, the Fork actually performs a simulation, which is why it’s so fast. So, the results, state changes, and changes in your wallet balance aren’t visible anywhere except within that Fork.
So, we’ll use a Fork to perform the five transactions that make up the multisig-approved transfer of 0.1 ETH. This way, we can be sure everything executes as expected and that we didn’t waste time, test ETH, or our energy 😌. Then, we’ll apply the simulated transactions’ raw form to Sepolia using MetaMask and run the transactions on Sepolia. Let’s try it out!
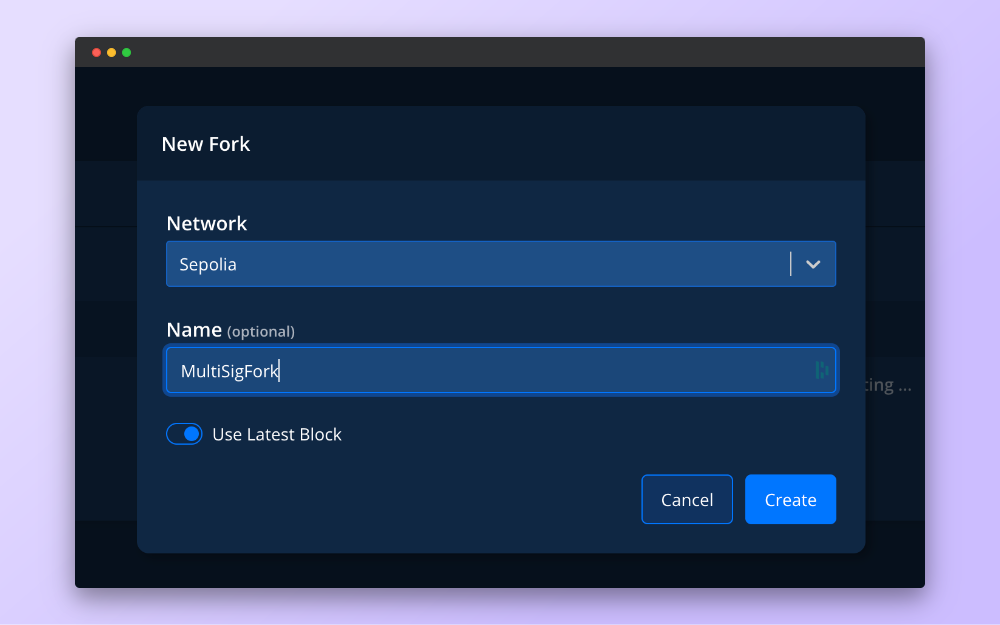
4.1. Create a Tenderly Fork
Now, let’s set up a Tenderly Fork as a testing network. First, go to the Tenderly Dashboard and open the Forks tab on your left. Next, click the Create a Fork button and fill in the details. The multisig wallet you deployed on the testnet will be visible to the Fork with topped-up balance, so you can send (simulated) transactions to it.
4.2. Send test ETH on a Tenderly Fork
Let’s use the Tenderly Fork we just created to try out the multisig scenario and test the execution of multiple transactions.
To send the test ETH from the multisig wallet, you need to submit that transaction. Here are the needed steps:
- Select the multisig smart contract from the first dropdown menu and choose the
submitTransactionfrom the second one. - Paste the address to which you want to send the ETH in the address field. Let’s choose the second wallet/address on MetaMask.
- Set the value to 100.000 Wei and feel free to ignore the bytes field at this time. Our multisig wallet has 0.1 ETH, and we are sending 0.0000000000001 ETH out.
- Copy the first owner address from the
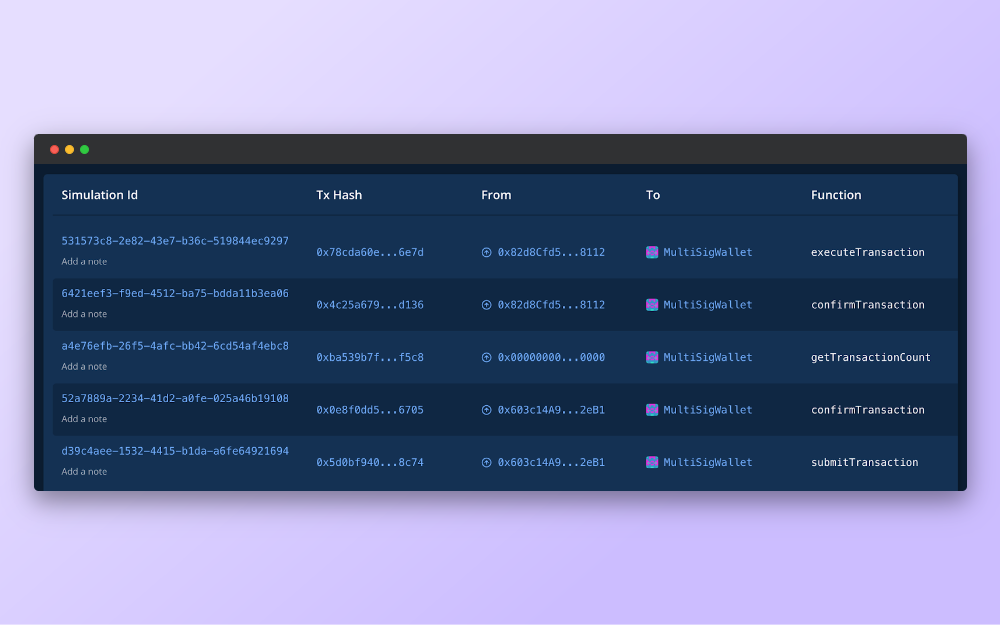
deploy.jsfile and paste it to the From field. - Click Simulate Transaction to submit the transaction.

6. Check the transaction details in the result window. Go to the Events tab to find the value of txIndex – the index our transfer got within the array of the submitted transactions in the multisig.

Now you have your first transaction submitted! You can check this by calling the getTransactionCount function in another simulation.

The output of this transaction should show that the transaction count has been raised by 1.
Now, let’s try to execute this transaction to transfer the test ETH by running a simulation of executeTransaction with txIndex 0. Will this transaction be successful?
You might have guessed – it won’t. You need to have the right number of signatures to execute it, which is two in this case. You can try executing it to see for yourself, free of charge.
To get these two confirmations, you need to run two new simulations:
- In the new simulation, choose the
confirmTransactionfunction. - Put 0 in the Input Parameters field
_txIndex, as it’s the index of your first transaction which is still pending (txIndexfrom theSubmitTranscationevent). - On the right, fill in the first owner’s address in the From field. This simulates a confirmation by the first owner.
- Click Simulate.

You now have the first signature of the two you need to transfer funds.
You’re halfway through! Repeat the last step with the second wallet address and you’ll get the second signature.
Once you get the second signature, it’s finally time to execute the initial transaction you submitted. So, one more time, simulate the executeTransaction function and that’s it. You sent the tokens to your second wallet in this simulation. 🎉
To confirm that the transfer from the multisig to your second address happened properly on the Tenderly Fork, check out the State Changes tab of the final transaction. It should show that the balance of the multisig decreased and the balance of your second account increased.

5. Execute transactions on the Sepolia testnet
To complete these steps on a publicly used test network such as Sepolia, you need to run the five transactions, confident they will execute flawlessly on the testnet. We’ll copy the raw input of each of the simulated transactions and then use MetaMask to send it to Sepolia.
To call smart contracts via MetaMask and specify the transaction Input, you might have to enable this option first.
Open MetaMask and click the menu icon. To open MetaMask in a new browser tab by clicking Expand view.

Next, click the top-right icon and select Settings.

Select Advanced in the menu to the left in the following window and scroll down to Show Hex Data. This is usually turned off, so turn it on to be able to paste the hex code to MetaMask. Next, click the MetaMask logo in the top left corner to return to the main window.

Now, we’ll use use MetaMask to send the transactions we tried out on the Fork to the multisig deployed on Sepolia. We’ll achieve this by copying the raw input of the simulated transactions. This value corresponds to the transaction input field (the hex data in MetaMask). It contains the call to the multisig function encoded together with the call arguments.
Open the Fork page and you should see something similar to the following.
- Open the submitTransaction at the bottom, find the Raw Input section, and click to copy the value.

2. Go back to MetaMask and click the Send button.
3. In the following window, paste the raw input hex code to the Hex Data field at the bottom.
4. Click Next.
5. Go to the Tenderly Dashboard and you’ll see the transaction after a while waiting to be mined.

- Repeat steps 1-5 for the first confirmTransaction.
- Repeat steps 1-5 for the second confirmTransaction.
- Repeat steps 1-5 for executeTransaction.
When you go back to Tenderly, you’ll see all of your transactions in the Tenderly Transaction Overview. Once done, you’ll have successfully executed the transaction on a test network. This time, the tokens will show up in your second MetaMask wallet.
6. Create and deploy a multisignature smart contract with Tenderly
Congratulations, you made it! Now you know how a multisignature wallet works and, more importantly, how to build and deploy one. The best of all? This is just the beginning as there’s so much more you can do with smart contracts in Tenderly.
From debugging your code to forking a network and testing complex scenarios, the all-in-one Tenderly platform can help simplify and accelerate your entire development process. But, why talk about it when you can try it out yourself?